Published
- 12 min read
Gold Panning Equipment: What You Actually Need (And What's a Waste)

I have a shelf in my garage that I call the Wall of Shame. It’s where all my bad gold prospecting gear purchases go to die.
There’s a $45 “professional prospecting kit” from Amazon that came in a canvas bag with a zipper that broke the first time I opened it. A steel pan I never seasoned properly so it rusted in my truck for six months. Two snuffer bottles with tips so narrow they couldn’t pick up anything bigger than flour gold. A magnifying loupe I’ve used exactly once. And a crevicing tool set that’s actually decent but I bought three of them because I kept losing them in the creek, which says more about me than the product.
Point is: I’ve spent money on gold panning equipment so you don’t have to repeat my mistakes. This is the gear guide I wish somebody had handed me before I drove to the sporting goods store with a credit card and no plan.
The $30 Starter Kit (All You Actually Need)
Here’s something nobody selling gold prospecting gear wants you to hear: you can get started for about thirty bucks. That’s it. Everything else is upgrades you earn the right to buy after you’ve actually found some gold.
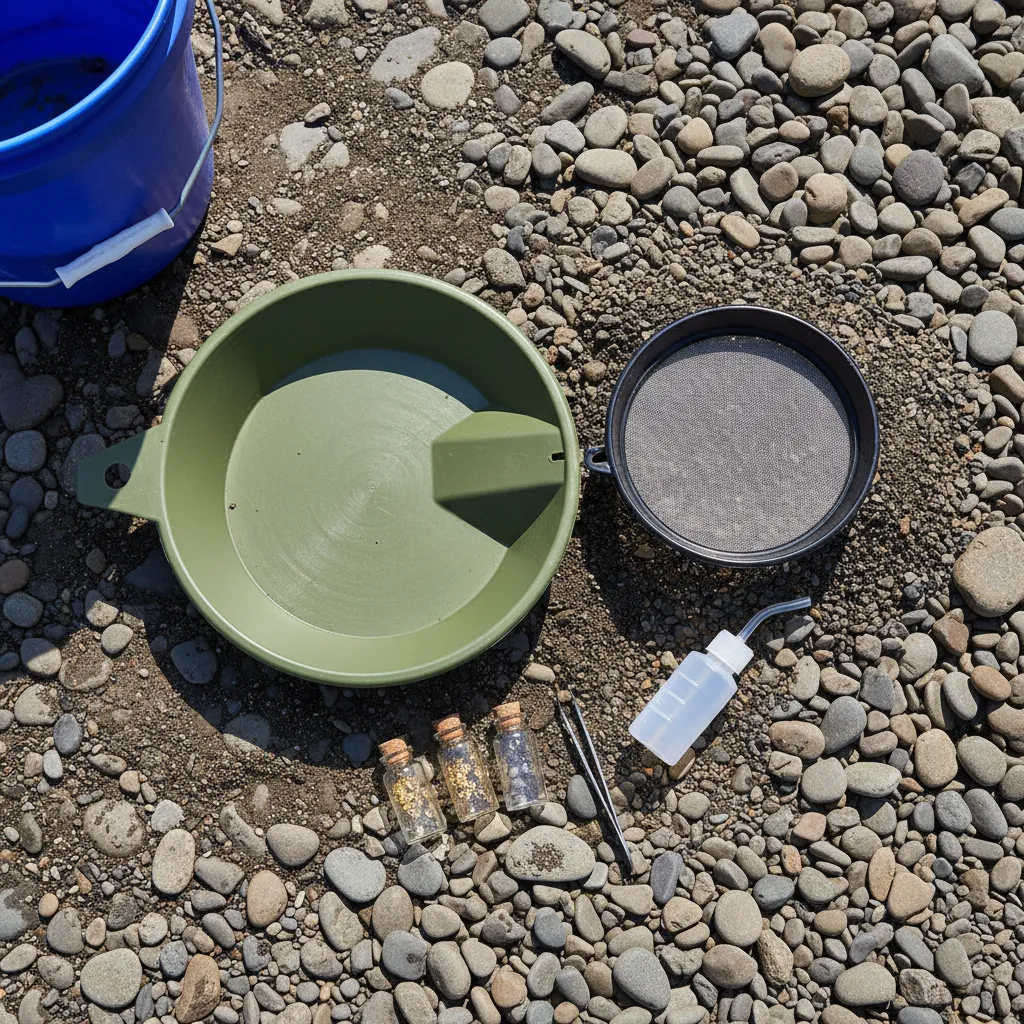
The Pan
A 14-inch plastic pan is the only pan a beginner needs. Green or blue. Not black. I’ve tried pans from Garrett, SE, Stansport, and a couple no-name brands, and here’s what I’ve landed on after three years: the Garrett 14-inch green pan for about $12 is the best value in prospecting. Period.
Why 14-inch instead of 10? More material per load, which means fewer trips to the creek bank to refill. A 10-inch pan is fine for sampling — I keep one in my pack for quick test pans when I’m scouting a new stretch of water — but for actual prospecting sessions, the 14-inch is what you want. I learned this the hard way on a trip to the South Platte in November when I was crouching in 40-degree water trying to process enough material with a tiny pan to figure out if the spot was worth working. Took me twice as long as it should have.
Why plastic over steel? Steel pans are traditional and some old-timers swear by them. Gene, the retired prospector who taught me to pan on Clear Creek, uses a battered steel pan that probably predates the internet. But steel needs to be seasoned (burned over a fire to remove oils) or gold won’t stick to the riffles properly. Forget to season it, or touch the inside with greasy fingers, and gold slides right out. Plastic works out of the box. The molded riffles trap gold mechanically. No seasoning, no maintenance, no rust. I seasoned a steel pan once, set it in the back of my truck “to cool down,” forgot about it, and found it two weeks later with an orange patina. That’s when I became a plastic pan person.
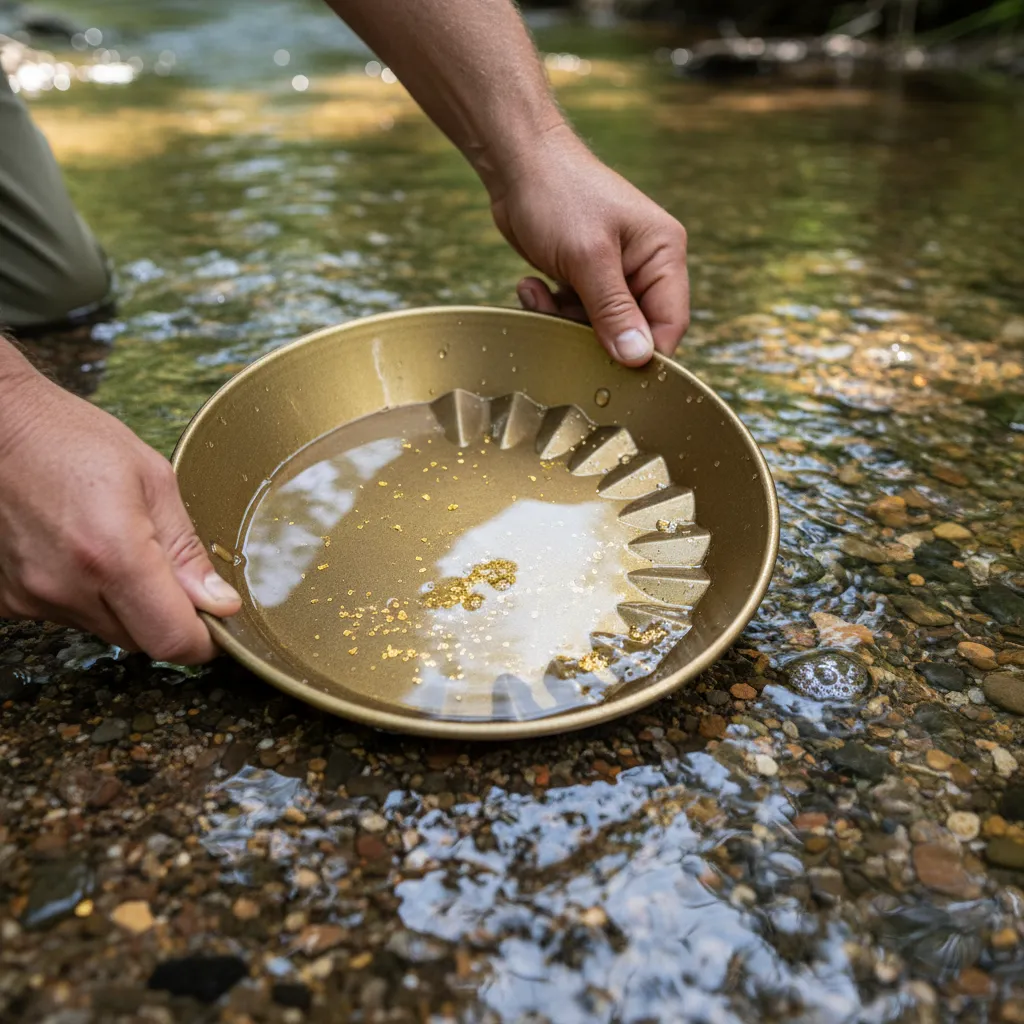
The green or blue color isn’t aesthetic preference — it’s functional. Gold is yellow. Against green or blue, even microscopic flour gold is visible. Against black, you’ll miss half of what’s in your pan. I found this out by switching from a black SE pan to my green Garrett mid-session on the Arkansas River near Leadville. Same gravel, same technique. I was suddenly seeing flakes I’d been washing out all morning.
The Support Cast
Classifier screen ($8-12). A 1/2-inch mesh that sits on top of your pan and screens out rocks and debris. This single accessory cut my panning time roughly in half. You’re not sitting there picking out pebbles one by one, and your material is pre-sized so the gold separates faster. I use a basic green classifier from SE that nests right onto my pan. Nothing fancy needed.
Snuffer bottle ($5-8). This is how you pick up small flakes from your pan without losing them. After going through two cheap ones with narrow tips that clogged constantly, I switched to a Pro-Line snuffer bottle with the wider opening. Night and day difference. The cheap ones from Amazon look identical in photos but the tip diameter matters — you want at least 3/16 inch or you’ll be fighting it every time.
Glass vials ($3-5 for a pack). Screw-top, not cork. I cannot stress this enough. Cork vials look great on Instagram. In practice, the cork swells when it gets wet (you’re standing in a creek, it will get wet), and then either it won’t seal properly or it pops out entirely. I lost a full day’s worth of fine gold from a spot near Breckenridge because the cork expanded and came off in my vest pocket. Found gold dust all through the lining. Screw-tops. Always.
Tweezers ($2-3). For the occasional piece big enough to grab with your fingers but small enough to fumble. Any fine-point tweezers work. I use ones from a first aid kit.
Total damage: roughly $30-35. That’s your gold panning kit. Everything else is optional.
The $200 Serious Setup
Once you’ve been out a dozen times and you know you’re hooked — and you will know, because you’ll start checking creek conditions on Google Maps during work meetings — it’s time to upgrade.
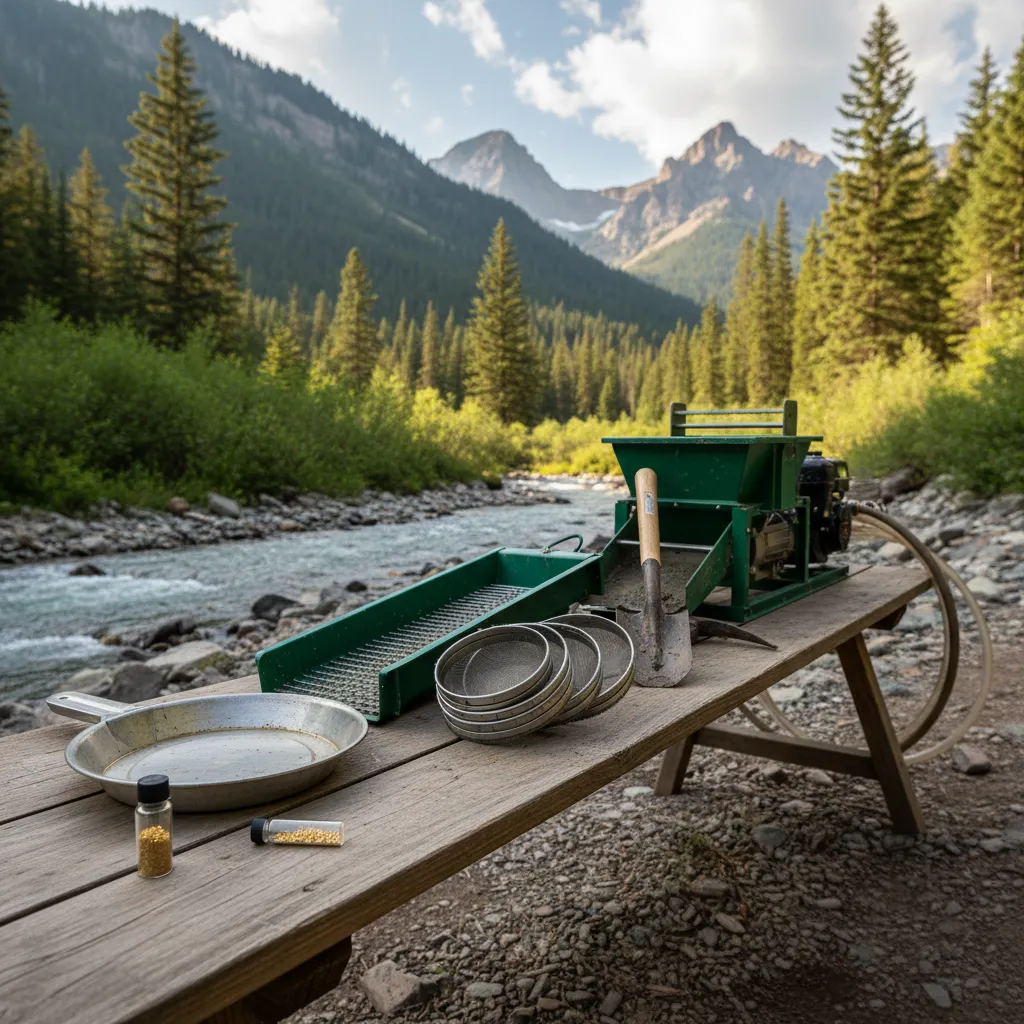
Classifier Stack
Instead of one screen, get a classifier set with multiple mesh sizes: 1/2 inch, 1/4 inch, and 1/8 inch. You run your raw material through them in sequence, biggest to smallest. The finest material goes in your pan. The medium stuff goes in your sluice (more on that in a second). This is called classifying, and it’s the difference between casual panning and actually recovering most of the gold in your material.
I bought a Keene stacking classifier set for about $35. Three years of heavy use and they’re still in perfect shape. The mesh is welded, not glued, which matters after your tenth trip.
Sluice Box
A sluice box is a channel that uses flowing water to separate gold from gravel continuously. Instead of processing one pan at a time, you’re shoveling classified material into the top and letting gravity and water do the work. A basic folding sluice runs $60-100.
My first sluice was a 24-inch Stansport folding model. It works. Not great, not terrible. If I were buying again, I’d spend the extra money on a Keene A52 or similar — better riffle design, sturdier construction. The cheap ones flex in fast current and don’t sit flat, which means gold walks right over the riffles instead of getting trapped.
Fair warning: a sluice box doesn’t replace your pan. You still need to pan out the concentrates that collect behind the riffles. The sluice just processes material 10-20x faster than panning alone, so you end up with a smaller volume of concentrates to finish by hand.
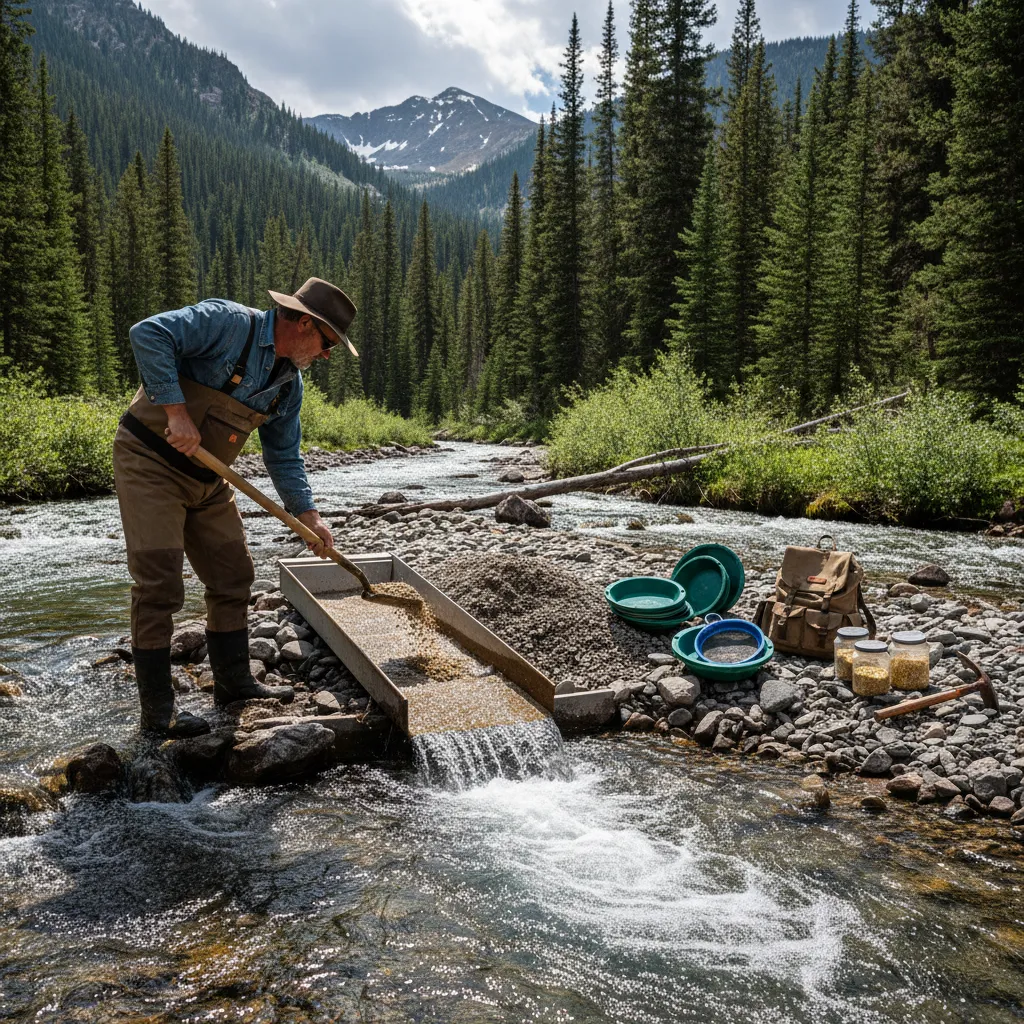
Creek Gear
This is where beginners cheap out and regret it immediately.
Waders or waterproof boots. Wet cotton jeans in a mountain creek at 8,000 feet will ruin your whole day faster than finding no gold. I started with rubber rain boots from Walmart. They leaked within a month. Now I use neoprene hip waders — warmer, waterproof, and they let me get into deeper water where nobody else bothers to dig. Cost about $40-50.
Neoprene gloves. Your hands will be in cold water for hours. I didn’t wear gloves my first season because I thought it would reduce my dexterity. By November my fingers were so stiff I could barely operate the snuffer bottle. 3mm dive gloves, about $15. You lose a tiny bit of feel but gain the ability to prospect past September without suffering.
Sun protection. Water reflects UV like crazy. I got the worst sunburn of my life prospecting Clear Creek in June because I was focused on a productive bedrock crevice and didn’t notice four hours had passed. Hat, sunscreen, long sleeves. Not optional.
A good pack or 5-gallon bucket. I’ve moved to a bucket with a lid that doubles as a seat. Haul material in it, sit on it while panning, carry your gear home in it. Five bucks at Home Depot.
The $500+ Advanced Rig
This tier is for people who prospect regularly and want to cover more ground. I’m not fully here yet myself — I’ve spent maybe $400 total over three years — but I’ve used friends’ gear enough to have opinions.
Highbanker
A highbanker is basically a sluice box with its own water pump. You set it up on the bank (hence the name) and feed it material without needing to be in the creek. Recirculating models let you work areas with no running water, like old dry channels and ancient placer deposits. These run $200-400 for a decent unit.
My buddy Mike runs a Keene A52S highbanker on the Arkansas River and processes more material in an afternoon than I can in a full weekend with my sluice. The difference is absurd. But it’s also 30 pounds of gear, needs a battery or generator for the pump, and takes 20 minutes to set up. It’s a commitment.
Gold Wheel / Blue Bowl
A blue bowl ($60-80) is a finishing tool for concentrates. It uses water flow and centrifugal motion to separate fine gold from black sand. Handy if you’re processing a lot of material, but I’d categorize it as “nice to have” rather than essential. I still finish my concentrates by careful panning, which works fine.
Power Sluice / Mini Dredge
Small suction dredges ($300-800) vacuum material from the creek bottom and run it through an onboard sluice. They’re the most efficient way to work a claim. They’re also regulated or banned in many states, so check your local gold panning laws before you even think about buying one. California’s dredging moratorium has been going since 2009. Colorado requires permits. Some states are wide open. Do the homework first.
Gear Mistakes I’ve Made (So You Won’t)
After a few years of prospecting and more gear purchases than I’d like to admit, here’s what I’d tell myself if I could go back:
Don’t buy a kit. Those $50-80 “complete prospecting kits” are assembled from the cheapest possible components. The pan is usually undersized, the snuffer bottle is always garbage, and you’re paying a premium for packaging. Buy each piece individually. You’ll spend less and get better stuff.
Don’t buy a sluice before you can pan. A sluice doesn’t find gold — it processes material faster. If you don’t know how to read a river and find productive spots, a sluice just helps you process barren gravel more efficiently. Learn the fundamentals first. Pan for a full season. Then upgrade.
Don’t overthink the pan. Some companies sell $30-40 “engineered” pans with special riffle patterns and premium plastics. A $12 Garrett works just as well. I’ve tested this side-by-side. Same material, same technique, same results. Your skill matters infinitely more than your pan’s riffle geometry.
Do invest in comfort gear. Waders, gloves, a good hat, a bucket to sit on. Comfort directly translates to time on the water, and time on the water directly translates to gold found. Every piece of comfort gear I’ve bought has paid for itself in longer, more productive sessions.
Do bring more vials than you think you need. Nothing worse than a productive day with nowhere to put your finds. I keep five empties in my pack at all times.
Where to Use All This Gear
Equipment means nothing without productive ground. I’ve mapped over 75,000 historic mine sites on the GoldFever.app map using USGS data, and the pattern is clear: the best spots for recreational prospecting are downstream from historic mine clusters on public land. Those old-timers found the gold — you’re just catching what they left behind and what nature has continued to deposit.
If you’re just getting started and haven’t picked a location yet, check out the best gold prospecting locations across the US. Colorado, California, Georgia, and North Carolina all have accessible public land with proven gold. I’d also recommend starting on a creek that’s known to produce rather than trying to discover a new spot — build your skills where gold is confirmed, then explore.
The Bottom Line on Gold Prospecting Gear
Start with $30 worth of gold prospecting tools and a creek that has gold in it. That’s all you need. The best equipment in the world won’t help if you’re working barren ground, and the cheapest pan in the world will find gold if you’re in the right spot with decent technique.
Upgrade when the gear is genuinely limiting you, not when a YouTube video makes something look cool. I upgraded to a sluice box after I found myself spending more time processing material than actually prospecting — the bottleneck was throughput, not technique. That’s the right reason to upgrade. “It looks fun” is not.
And if you end up with your own Wall of Shame shelf, at least you’ll have good stories about every item on it.