Published
- 14 min read
Gold Sluice Box Guide: Setup, Technique, and What to Buy
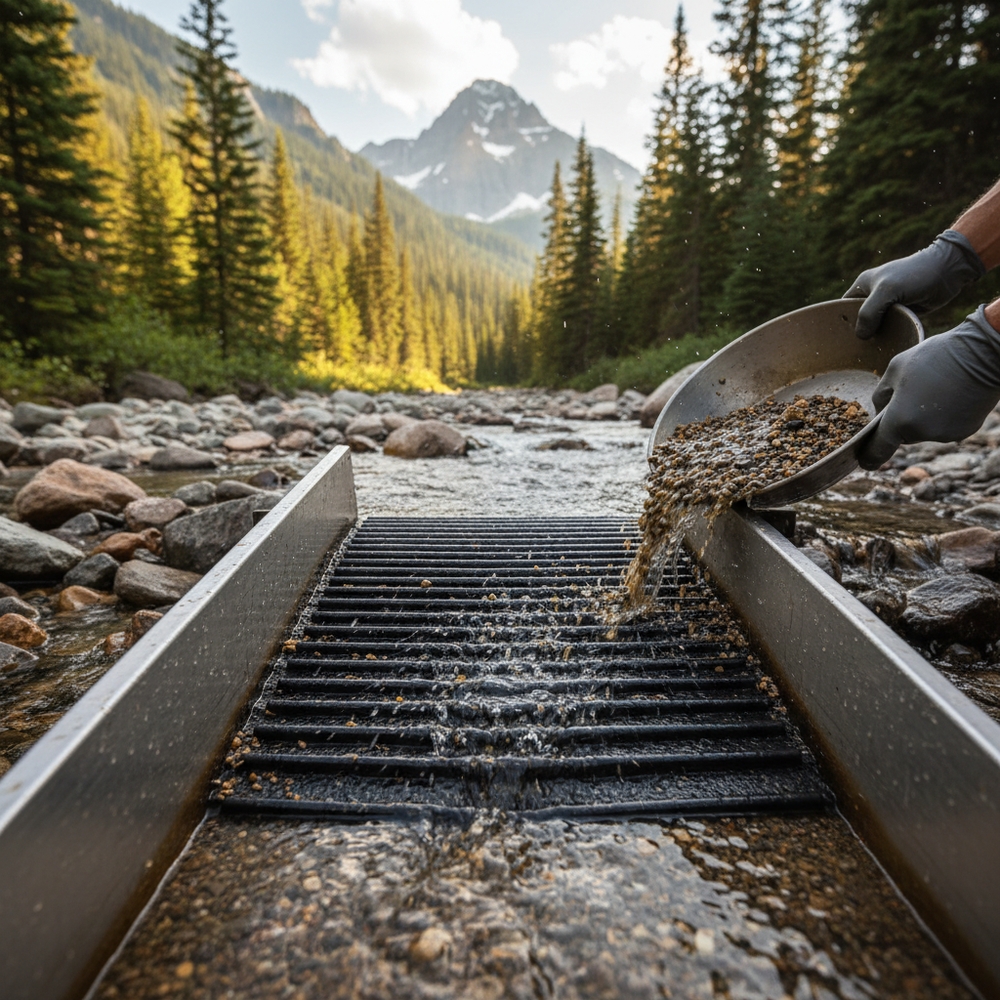
A gold sluice box is the single biggest upgrade you can make from hand panning. I resisted buying one for almost a full season because I thought it was unnecessary — I was finding flakes with my pan, so why complicate things? Then I watched a guy at Clear Creek run a 24-inch sluice for about forty minutes and pull out more gold than I’d found all month. He wasn’t even in a particularly good spot. He was just processing way more material than I could ever move with a pan.
That’s the fundamental advantage of a gold sluice box: volume. A pan processes maybe a quarter-bucket of material every 15 minutes if you’re careful. A sluice box processes that same amount in about 90 seconds, continuously, while you keep shoveling. Over an 8-hour day, a sluice can run through 20 to 50 times more gravel than hand panning. And since placer gold is distributed unevenly through streambed material, more material means more gold. Simple math.
This guide covers everything I’ve learned about sluice boxes after three seasons of use — from the $40 starter box I bought on impulse to the recirculating setup I run now when water’s too low for a stream sluice.
What Is a Gold Sluice Box and How Does It Work?
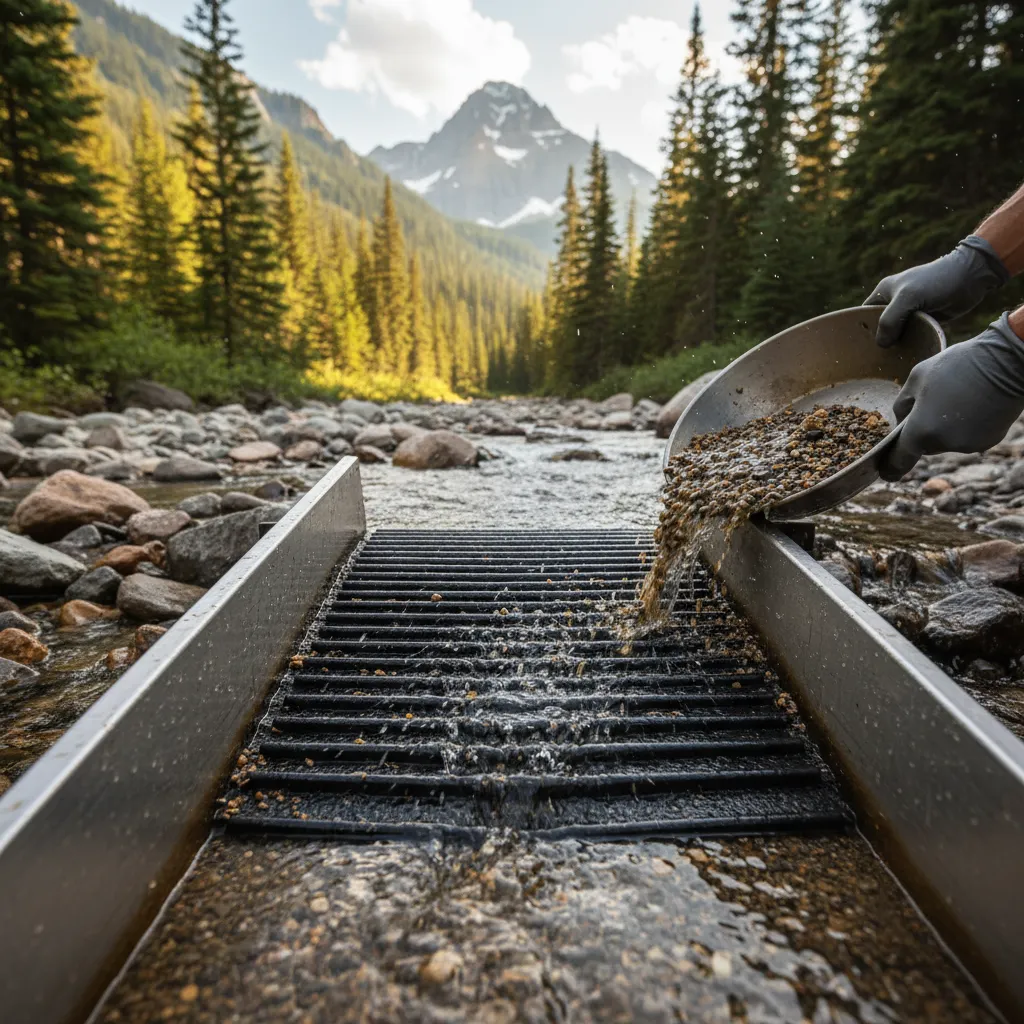
A sluice box is a long, narrow channel with riffles (raised bars) and matting on the bottom. You set it in flowing water — or pump water through it — and feed gravel into the top end. Water carries lighter sand and rock out the bottom while gold, being 19.3 times denser than water, drops behind the riffles and gets trapped in the matting underneath.
It’s the same physics as a gold pan, just automated. The water does the separation work instead of your wrists.
The key components:
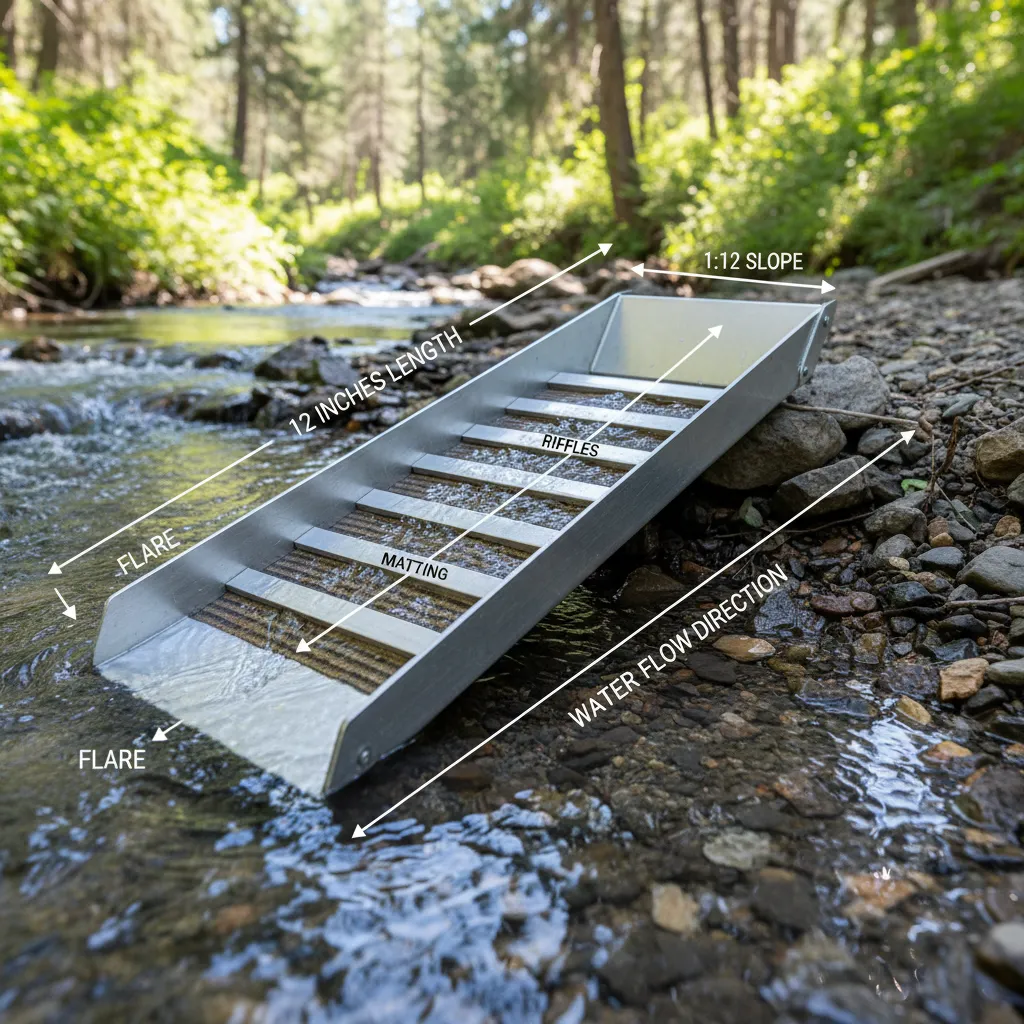
- Flare or hopper: The wide top section where you feed material
- Riffles: Raised bars (metal, plastic, or rubber) that create dead zones where gold settles
- Matting: Carpet-like material under the riffles that catches fine gold
- Sluice body: The channel itself, usually aluminum or plastic, 24 to 50+ inches long
Every riffle creates a small pocket of slow-moving water on its downstream side. Heavy particles — gold, black sand, lead — drop into these pockets and stay trapped. Lighter material washes over the top and out the end. After running material for 30 minutes to an hour, you pull the riffles and matting, pan out the concentrates, and (hopefully) find gold.
Types of Sluice Boxes: Which One Do You Need?
Not all sluice boxes do the same job. The right one depends on where you prospect and how much you want to spend.
Stream Sluice (The Classic)
This is the standard sluice that sits directly in a creek. Water flows through naturally — no pump needed. You shovel classified material into the flare, and the current does the work.
Best for: Creeks with consistent flow (at least 4-6 inches of water moving at a decent pace). This is what most beginners should start with.
Cost: $40-$120 for a quality unit. The entry-level boxes from brands like Stansport and SE run around $40-60. Mid-range options from Keene and Gold Buddy sit at $80-120 and use better riffle designs.
Limitations: You’re limited to locations with enough moving water. No water, no sluicing. I learned this the hard way when I drove two hours to a spot in late August only to find the creek was barely a trickle.
Recirculating Sluice
A self-contained unit with a built-in water pump that recycles the same water over and over. You add water from any source — a bucket, a puddle, even a garden hose — and it circulates continuously.
Best for: Low-water conditions, desert prospecting, or locations where you can’t set up in a stream. Also great for processing material you brought home.
Cost: $150-$300. These are more complex with pumps and reservoirs. The Gold Cube and Bazooka Gold Trap are popular options in this range.
Trade-off: Requires a 12V battery or generator to run the pump. More to carry, more to set up. But you can sluice anywhere with any water source.
Highbanker (Power Sluice)
A highbanker is a sluice box on legs with a water pump that sprays water into a hopper at the top. You shovel raw, unclassified material directly in. The water spray breaks up clay, washes material through a built-in classifier, and feeds it into the sluice section below.
Best for: Serious prospectors processing large volumes. If you’ve outgrown a basic sluice and want to move 10-20 times more material per hour, this is the next step.
Cost: $300-$800+ for a good setup. Keene and Proline make the go-to units. Budget another $100-200 for a pump if it’s not included.
Legal note: Highbankers are not covered under “casual use” rules in many jurisdictions because of the motorized pump. Check your state’s prospecting regulations before running one on public land. In California, for example, you may need a Small Mining Operation permit. On BLM land, motorized equipment generally triggers a Plan of Operations requirement.
Mini/Backpacking Sluice
Ultra-compact sluices (12-18 inches) designed for hiking into remote spots. They work, but process material slowly due to their small size.
Best for: Remote access areas where weight matters. Not a primary tool — more of a companion to hand panning when you want slightly more throughput.
Cost: $25-$50.
How to Set Up a Sluice Box (Get This Right or Lose Gold)
Setup is where most people screw up, and bad setup means gold washing straight through your box. I ran my first sluice too steep for weeks and couldn’t figure out why I was barely catching anything. The answer was simple: my angle was wrong.
Step 1: Find the Right Spot
Before you even place your sluice, you need to read the water and find where gold concentrates naturally. The best sluice in the world won’t help if you’re processing barren gravel.
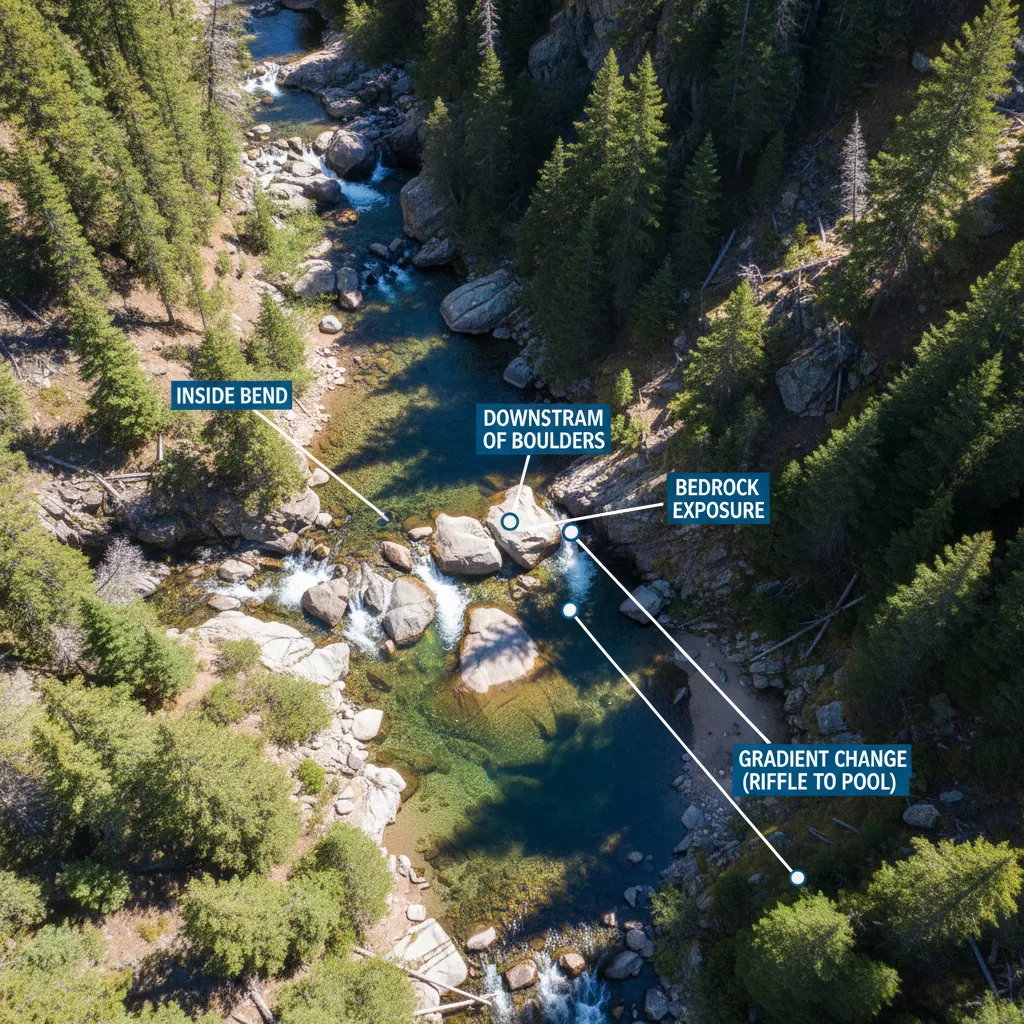
Look for:
- Inside bends of the creek where flow slows and gold drops
- Downstream of large boulders where eddies trap heavy material
- Bedrock exposures where gold gets caught in cracks
- Gravel bars at the tail-end of pools
According to USGS placer deposit studies, gold concentrations are highest in active streambeds with exposed or near-surface bedrock, particularly in areas where stream gradient changes sharply — like the transition from a steep riffle section to a flatter pool. These are your priority dig spots.
Step 2: Set the Angle
The correct angle is approximately 1 inch of drop per 12 inches of sluice length. That works out to about a 5-degree slope. For a 24-inch sluice, the top should be roughly 2 inches higher than the bottom.
Here’s how I check it: drop a small pinch of sand into the top of the sluice while water is flowing. The sand should move steadily down the box but not race through. If it shoots out the bottom in seconds, you’re too steep. If it barely moves, you’re too flat and material will pile up behind the riffles.
Too steep (common beginner mistake): Water moves too fast, carries gold right over the riffles and out the end. I probably lost weeks of gold to this mistake.
Too flat: Material builds up, buries the riffles, and nothing separates properly. You’ll spend more time cleaning clogs than finding gold.
Step 3: Stabilize the Box
Wedge rocks under and around the sluice so it doesn’t shift. A sluice that moves mid-run is a sluice that’s losing gold. I carry a few flat river rocks specifically for shimming. Some prospectors use bungee cords or small sandbags. Whatever works — just make sure it’s rock solid.
Step 4: Dial In the Water Flow
Water should flow smoothly over the riffles with small turbulent eddies forming behind each one. You want to see a slight “boiling” action behind each riffle — that’s the dead zone where gold settles.
Signs of correct flow:
- Small vortexes visible behind each riffle
- Material moves steadily but not violently
- Black sand accumulates behind riffles within a few minutes of feeding
Signs of too much flow:
- Water is white and turbulent across the whole box
- Nothing accumulates behind the riffles
- You can hear the riffles rattling
Running the Sluice: Technique That Actually Matters
Classify Your Material
This is the step that separates productive sluicers from frustrated ones. Always classify (screen) your material before feeding it into the sluice. Use a 1/2-inch classifier at minimum. I use a stacked set — 1/2-inch on top of 1/4-inch — and process the fines that drop through.
Why? Large rocks disrupt water flow, push riffles around, and can actually sweep gold out of the box. Plus, 90%+ of recoverable placer gold is smaller than 1/4 inch. That big nugget fantasy is fun but statistically you’re hunting for fines and flakes.
If you’re still building your equipment setup, a couple of classifier screens are the best $15-20 you’ll spend.
Feed Slowly and Steadily
Dump a scoop of classified material into the flare and let it wash through before adding more. Never overload the sluice. I aim for about one shovel of classified gravel every 20-30 seconds. If you see material piling up behind the first riffle, you’re feeding too fast.
Think of it like a conveyor belt. Steady input, steady output, continuous separation. The moment you dump a huge load in at once, you overwhelm the riffles and gold escapes with the waste material.
Monitor and Adjust
Every 10-15 minutes, check behind your first few riffles. You should see black sand accumulating. If you don’t, something is wrong — usually the angle or flow rate. Adjust and keep going.
I also do a quick “test pan” about 30 minutes in. I’ll pull a small scoop of concentrate from behind the first riffle and pan it right there. If I see gold, the sluice is working. If I see nothing, I troubleshoot before wasting another hour.
Clean-Out: Where the Gold Actually Appears
After 30-60 minutes of running material (or when black sand is building up heavily), it’s time for clean-out.
- Stop feeding material and let the sluice run clean for 2-3 minutes to flush remaining sand
- Remove the sluice from the water carefully — don’t tip it or slosh
- Pull the riffles and set them in a bucket of water. Swish them to release trapped material
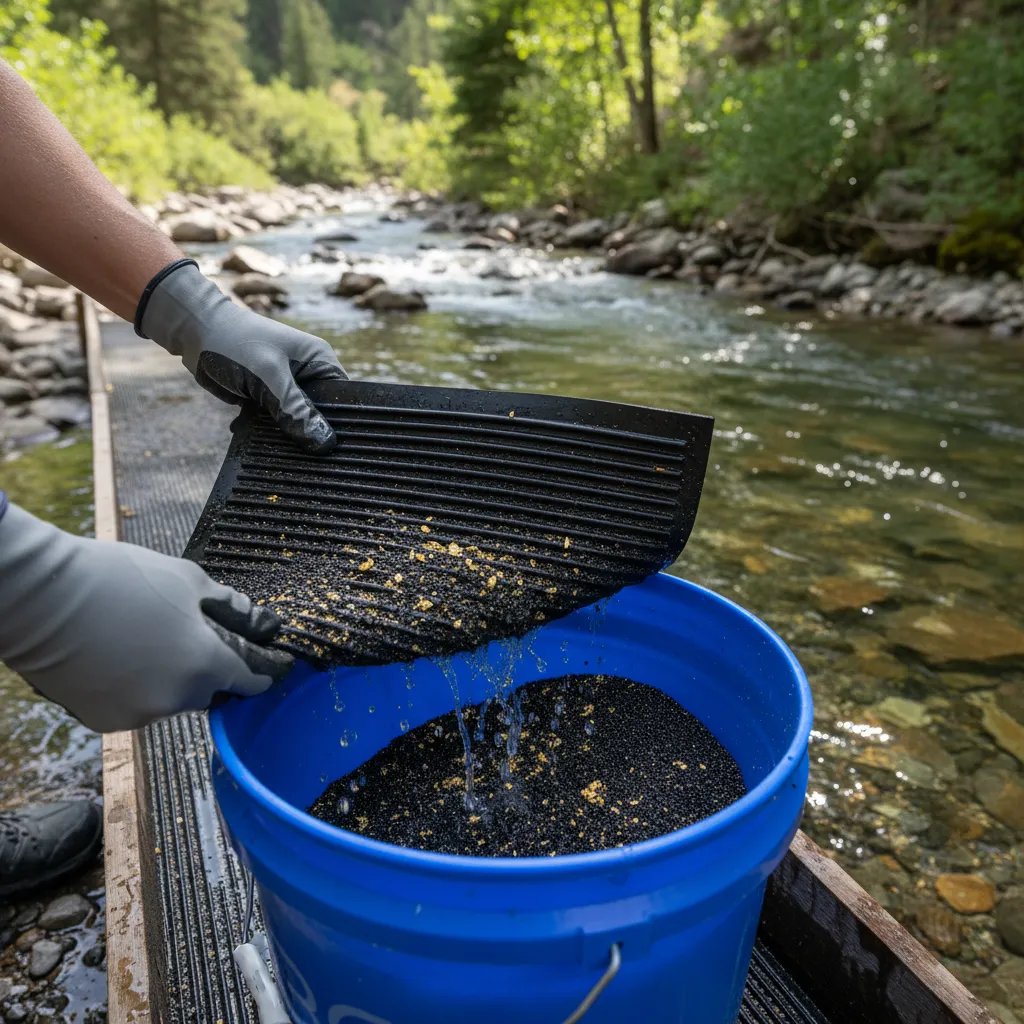
- Remove the matting and wash it into the same bucket. Work it thoroughly — fine gold hides in carpet fibers
- Pan the concentrates from the bucket. This is where your gold is
The first clean-out is always the most exciting. And sometimes disappointing. My first ever sluice clean-out produced about a quarter-gram of gold and a lot of black sand. I was expecting more, but honestly that was way better than what I’d been getting with a pan alone.
Understanding Riffle Types
Not all riffles are created equal, and the type in your sluice affects what size gold you catch.
Hungarian Riffles
Angled or V-shaped riffles that direct material toward the center or edges. Most common in commercial sluices. Good all-around performance for mixed-size gold.
Expanded Metal Riffles
Diamond-pattern metal mesh. Creates many small pockets that catch fine gold effectively. My preference for fine gold recovery — I’ve noticed significantly more flour gold in my concentrates with expanded metal versus straight riffles.
Rubber Ribbed Matting
Flexible rubber with parallel ribs. Often used as a one-piece riffle-and-mat combo in budget sluices. Works okay but doesn’t catch the finest gold as well as expanded metal over miner’s moss.
Miner’s Moss (Vortex Matting)
Not a riffle but the matting underneath. Looks like tangled green or black fibers. Creates thousands of tiny vortex traps. This is where your finest gold ends up. Always use miner’s moss or a similar deep-fiber mat under your riffles.
Budget Breakdown: What to Actually Spend
| Setup Level | What You Get | Cost Range | Best For |
|---|---|---|---|
| Starter | 24” stream sluice + classifier | $40-$75 | Beginners, casual prospecting |
| Mid-Range | 36” sluice + classifier set + upgraded matting | $100-$180 | Regular weekend prospectors |
| Recirculating | Self-contained recirculating sluice | $150-$300 | Low-water areas, home processing |
| Highbanker | Power sluice with pump + hoses | $300-$800+ | Serious volume, claim work |
My recommendation for beginners: Start with a $50-70 stream sluice and a half-inch classifier. That’s it. Don’t buy the highbanker until you’ve run a basic sluice for a full season and know you want to keep going. I’ve seen too many people spend $500 on gear they use twice. If you’re still deciding what to buy first, the complete equipment guide breaks down every piece of gear by budget tier.
Legal Requirements for Sluice Box Use
This is where a lot of people get tripped up. A gold pan is almost universally legal on public land under “casual use” provisions. A sluice box? It depends.
Generally allowed under casual use (no permit needed):
- Hand-fed sluice boxes with no motorized components
- On BLM or National Forest land open to mineral entry
- Outside of active mining claims
- Without significant ground disturbance
Usually requires a permit or is restricted:
- Any motorized equipment (highbankers, dredges, recirculating pumps on public waterways)
- National Parks, Wilderness Areas, Wild & Scenic River corridors
- Active mining claims owned by someone else
- State-specific restrictions (California requires permits for nearly anything beyond a pan)
Check the full state-by-state breakdown of gold panning laws before you head out. And always verify with the local BLM or Forest Service field office — regulations change, and local offices sometimes have additional restrictions that aren’t well-publicized online. The GoldFever app shows mining claim boundaries so you can check before setting up.
Where Sluicing Works Best: Reading the Terrain
Not every creek is worth running a sluice on. Based on USGS placer deposit data, the most productive terrain for sluice box work shares specific characteristics:
- Active streambeds with exposed bedrock — gold gets trapped in cracks and depressions, and material sourced from these areas is naturally pre-concentrated
- Areas below known lode deposits — where gold originates in the rock directly uphill means more gold in the drainage below
- Stream sections with gradient changes — where a steep section flattens out, gold drops aggressively. USGS data shows placer deposits cluster at these transitions
- Desert washes in gold country — dry placer deposits in the Southwest can be incredibly rich and are perfect for recirculating sluices since there’s no stream flow
The key skill is learning to read the water and understanding where gold naturally concentrates. A sluice amplifies your ability to process material, but you still need to be digging in the right spot.
Common Mistakes (I’ve Made Most of These)
Running the sluice too steep. The most common mistake by far. Gold washes straight through. Start flatter than you think and adjust up.
Not classifying material. Throwing raw, rocky gravel into a sluice is like trying to pan with boulders in your pan. Screen it first.
Overfeeding. More material per scoop doesn’t mean more gold per hour. Overloaded riffles don’t separate anything — they just pass everything through.
Cleaning out too infrequently. If black sand buries your riffles, gold starts washing over them. Clean out every 30-60 minutes depending on how much black sand your material contains.
Ignoring the matting. I’ve seen beginners pan out the riffle concentrates and throw away the matting rinse water. Some of the finest gold — the stuff worth the most per ounce because it adds up — is in that matting.
Not doing test pans. Run a quick pan of your concentrates partway through. If nothing’s there, fix your setup before wasting more time.
From Pan to Sluice: The Natural Progression
If you’re just getting started with gold panning, stick with the pan until you can consistently find and recover fine gold. The pan teaches you technique, trains your eye, and helps you learn to read productive ground. A sluice doesn’t replace that knowledge — it builds on it.
Once you’re confident with a pan and you’re spending more time at the creek than your family thinks is reasonable, a basic stream sluice is the logical next step. It doesn’t change what you know — it just lets you apply that knowledge to 20 times more material in the same amount of time.
And honestly? Clean-out day on a sluice is still one of the best feelings in prospecting. You pull that matting, rinse it into a bucket, and pan down to see what the creek gave you. Sometimes it’s a few flakes. Sometimes it’s a line of gold sitting in the bottom of your pan that makes the whole day worth it.
Either way, you processed more ground in an afternoon than you could’ve panned in a week. That’s the point.