Published
- 33 min read
Gold Panning Equipment Guide (2026): Tested Gear $30-$500+

I have a shelf in my garage that I call the Wall of Shame. It’s where all my bad gold panning equipment purchases go to die.
There’s a $45 “professional prospecting kit” from Amazon that came in a canvas bag with a zipper that broke the first time I opened it. A steel pan I never seasoned properly so it rusted in my truck for six months. Two snuffer bottles with tips so narrow they couldn’t pick up anything bigger than flour gold. A magnifying loupe I’ve used exactly once. And a crevicing tool set that’s actually decent but I bought three of them because I kept losing them in the creek, which says more about me than the product.
Point is: I’ve spent money on gold panning equipment so you don’t have to repeat my mistakes. This is the gear guide I wish somebody had handed me before I drove to the sporting goods store with a credit card and no plan. All prices in this guide were refreshed for spring 2026 based on Amazon, Garrett Metal Detectors, and Keene Engineering retail pricing as of May 2026.
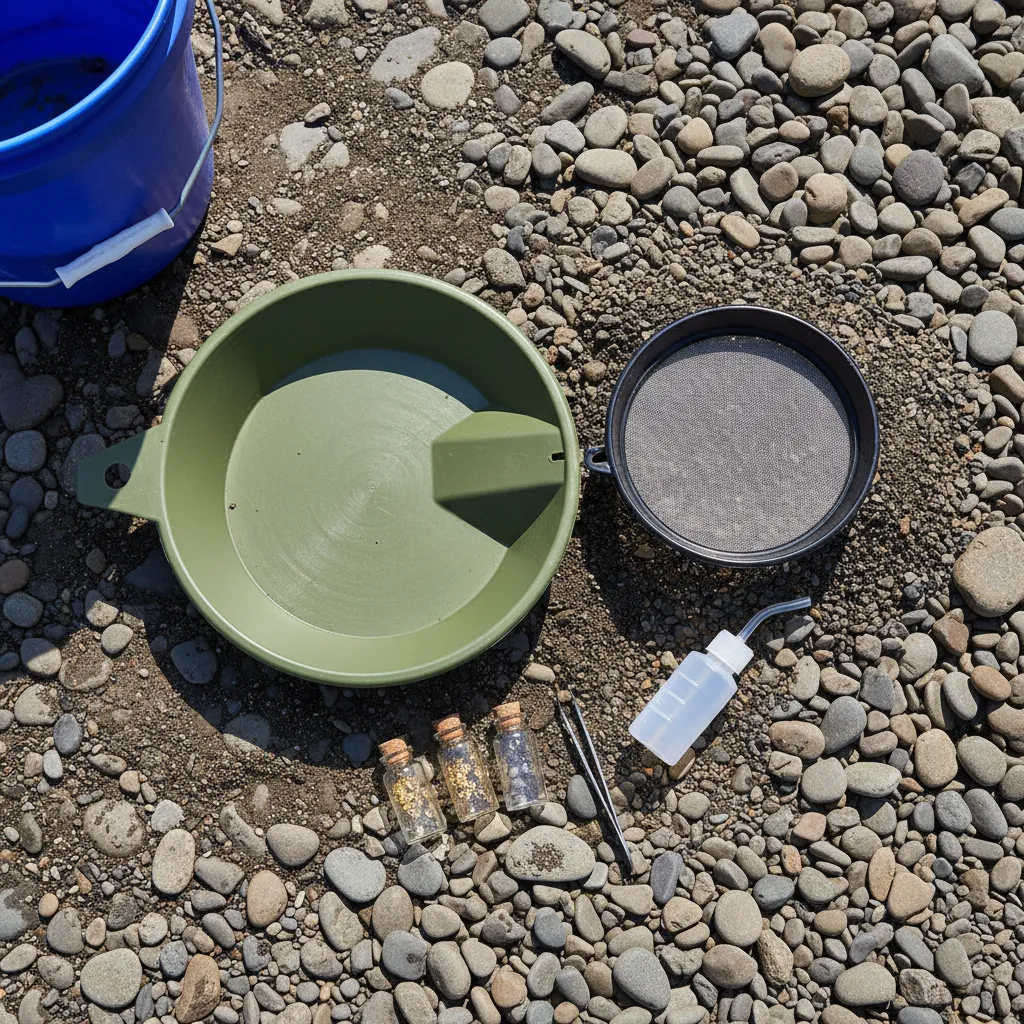
Quick answer: A functional gold panning kit costs $30-$35 for a 14-inch plastic pan, classifier screen, snuffer bottle, screw-top vials, and tweezers. Everything beyond that — sluice boxes, highbankers, waders — is an upgrade you earn after you’ve found gold with the basics.
Gold Panning Kit: The $30 Starter Setup (All You Actually Need)
Here’s something nobody selling gold prospecting gear wants you to hear: you can get started for about thirty bucks. That’s it. Everything else is upgrades you earn the right to buy after you’ve actually found some gold.
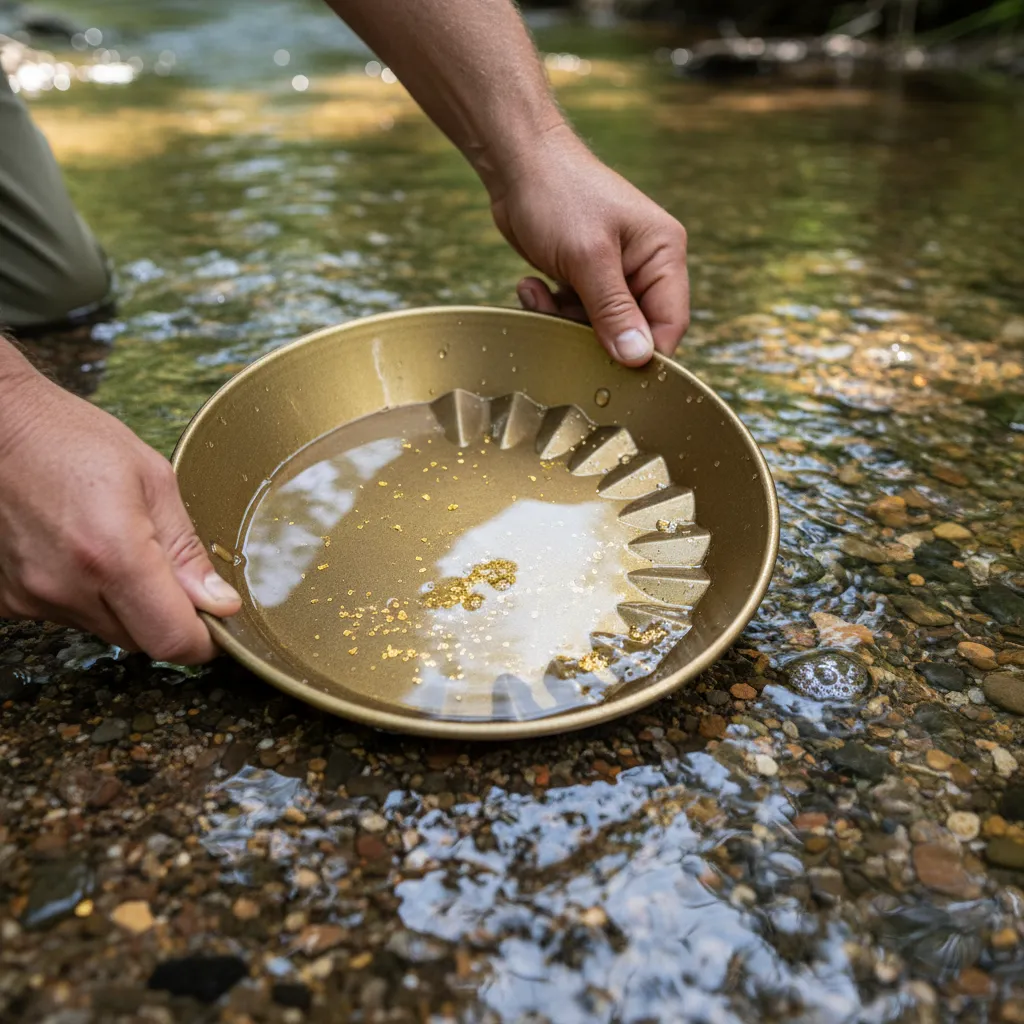
The Pan
A 14-inch plastic pan is the only pan a beginner needs. Green or blue. Not black. I’ve tried pans from Garrett, SE, Stansport, and a couple no-name brands, and here’s what I’ve landed on after three years: the Garrett 14-inch green pan for about $12 is the best value in prospecting. Period.
Why 14-inch instead of 10? More material per load, which means fewer trips to the creek bank to refill. A 10-inch pan is fine for sampling — I keep one in my pack for quick test pans when I’m scouting a new stretch of water — but for actual prospecting sessions, the 14-inch is what you want. I learned this the hard way on a trip to the South Platte in November when I was crouching in 40-degree water trying to process enough material with a tiny pan to figure out if the spot was worth working. Took me twice as long as it should have.
Why plastic over steel? Steel pans are traditional and some old-timers swear by them. Gene, the retired prospector who taught me to pan on Clear Creek, uses a battered steel pan that probably predates the internet. But steel needs to be seasoned (burned over a fire to remove oils) or gold won’t stick to the riffles properly. Forget to season it, or touch the inside with greasy fingers, and gold slides right out. Plastic works out of the box. The molded riffles trap gold mechanically. No seasoning, no maintenance, no rust. I seasoned a steel pan once, set it in the back of my truck “to cool down,” forgot about it, and found it two weeks later with an orange patina. That’s when I became a plastic pan person.
The green or blue color isn’t aesthetic preference — it’s functional. Gold is yellow. Against green or blue, even microscopic flour gold is visible. Against black, you’ll miss half of what’s in your pan. I found this out by switching from a black SE pan to my green Garrett mid-session on the Arkansas River near Leadville. Same gravel, same technique. I was suddenly seeing flakes I’d been washing out all morning. Knowing how to identify gold versus look-alikes matters too, and a high-contrast pan color makes that easier in the field.
The Support Cast
Classifier screen ($8-12). A 1/2-inch mesh that sits on top of your pan and screens out rocks and debris. This single accessory cut my panning time roughly in half. You’re not sitting there picking out pebbles one by one, and your material is pre-sized so the gold separates faster. I use a basic green classifier from SE that nests right onto my pan. Nothing fancy needed.
Snuffer bottle ($5-8). This is how you pick up small flakes from your pan without losing them. After going through two cheap ones with narrow tips that clogged constantly, I switched to a Pro-Line snuffer bottle with the wider opening. Night and day difference. The cheap ones from Amazon look identical in photos but the tip diameter matters — you want at least 3/16 inch or you’ll be fighting it every time.
Glass vials ($3-5 for a pack). Screw-top, not cork. I cannot stress this enough. Cork vials look great on Instagram. In practice, the cork swells when it gets wet (you’re standing in a creek, it will get wet), and then either it won’t seal properly or it pops out entirely. I lost a full day’s worth of fine gold from a spot near Breckenridge because the cork expanded and came off in my vest pocket. Found gold dust all through the lining. Screw-tops. Always.
Tweezers ($2-3). For the occasional piece big enough to grab with your fingers but small enough to fumble. Any fine-point tweezers work. I use ones from a first aid kit.
Total damage: roughly $30-35. That’s your gold panning starter kit. Everything else is optional.
Best Gold Pans: 5 Tested Side-by-Side (2026 Prices)
After testing five different gold pans side-by-side with the same material from the same dig site on the Arkansas River near Granite, Colorado (October 2024), here’s what I found. Each pan got three identical loads of pre-classified material from the same bucket. I weighed the recovered gold from each set on a 0.01g scale. This isn’t marketing copy — I paid for every one of these with my own money.
| Gold Pan | 2026 Price | Best For | Pros | Cons |
|---|---|---|---|---|
| Garrett Super Sluice 14” | ~$14 | Best all-around | Deep riffles, affordable, durable. My baseline pan. | Slightly heavy for all-day panning |
| SE 14” Green Pan | ~$9 | Budget pick | Cheapest functional pan. Fine for learning. | Shallower riffles, loses fine gold easier |
| Garrett Gold Catcher 14” | ~$12 | Fine gold recovery | Tight riffle pattern excels at flour gold | Smaller capacity per load |
| Stansport Steel 14” | ~$17 | Traditionalists only | Lasts forever, vintage feel | Must season, rusts, gold slides on oily surface |
| GPAA Gold Catcher | ~$11 | One-handed use | 4 riffles, lightweight | Fewer riffles means fewer trapping points |
My pick for beginners: The Garrett Super Sluice 14” green pan. It’s what I use 90% of the time, it’s $14 in 2026, and it consistently recovers more gold than fancier alternatives in my testing. Don’t let anyone tell you that a $30-40 “engineered” pan will find more gold. Your panning technique matters ten times more than your pan’s riffle geometry.
Gold Rush Panning Kits: Are Pre-Made Kits Worth It?
Walk into any sporting goods store or scroll Amazon for “gold rush panning kits” and you’ll see dozens of pre-bundled options ranging from $20 cardboard novelty kits to $150 “complete prospector packages.” After buying and returning four of them over the years, here’s the unvarnished verdict:
Most pre-made gold rush panning kits aren’t worth it. The economics don’t work in your favor — manufacturers bundle the cheapest components they can source, mark up the packaging, and bank on impulse buys at tourist gift shops near old mining towns.
That said, there are exceptions worth knowing about.
Pre-Made Kits That Actually Deliver
Garrett Gold Pan Kit (~$35-40): Contains a Garrett 14” Super Sluice pan, a 10” Backpacker pan, a snuffer bottle, two vials, and tweezers. This is the rare pre-made kit where every component is the one I’d buy individually. The reason: Garrett makes the components themselves rather than sourcing cheap third-party parts.
Stansport 8-Piece Gold Panning Kit (~$45): Decent if you can find it on sale. Includes a 14” pan, classifier, snuffer, vials, and tweezers. Components are mid-tier — not great, not terrible. Skip the canvas bag it comes in; the zipper fails inside a season.
Tourist Trap “Gold Rush” Kits to Avoid
If a kit is sold near a historic gold rush site for $50+ and includes:
- A pan smaller than 12 inches
- A magnifying glass
- A “history of the gold rush” booklet
- A leather pouch instead of vials
…it’s a novelty item, not real equipment. You’re paying for the experience of buying it at a gold rush museum gift shop, not for functional gear.
How to Build a Better Kit for the Same Money
For the $50 you’d spend on a mid-tier pre-made kit, assemble these individually for roughly $32:
| Component | Brand | 2026 Price |
|---|---|---|
| 14” green pan | Garrett Super Sluice | $14 |
| 1/2” classifier screen | SE Stackable | $10 |
| Snuffer bottle | Pro-Line wide-tip | $6 |
| Screw-top vials (5-pack) | Generic | $4 |
| Fine-point tweezers | Any first-aid brand | $3 |
| Total | $37 |
Save the leftover $13 for a neoprene glove pair or extra vials. The DIY kit will outlast and outperform any “gold rush starter kit” you can buy at retail.
The $200 Serious Setup
Once you’ve been out a dozen times and you know you’re hooked — and you will know, because you’ll start checking creek conditions on Google Maps during work meetings — it’s time to upgrade.
Classifier Stack
Instead of one screen, get a classifier set with multiple mesh sizes: 1/2 inch, 1/4 inch, and 1/8 inch. You run your raw material through them in sequence, biggest to smallest. The finest material goes in your pan. The medium stuff goes in your sluice (more on that in a second). This is called classifying, and it’s the difference between casual panning and actually recovering most of the gold in your material.
Use 1/8-inch mesh if you’re targeting fine or flour gold (common in most rivers). Use 1/4-inch in areas known for larger flakes or small nuggets. I bought a Keene stacking classifier set for about $35. Three years of heavy use and they’re still in perfect shape. The mesh is welded, not glued, which matters after your tenth trip.
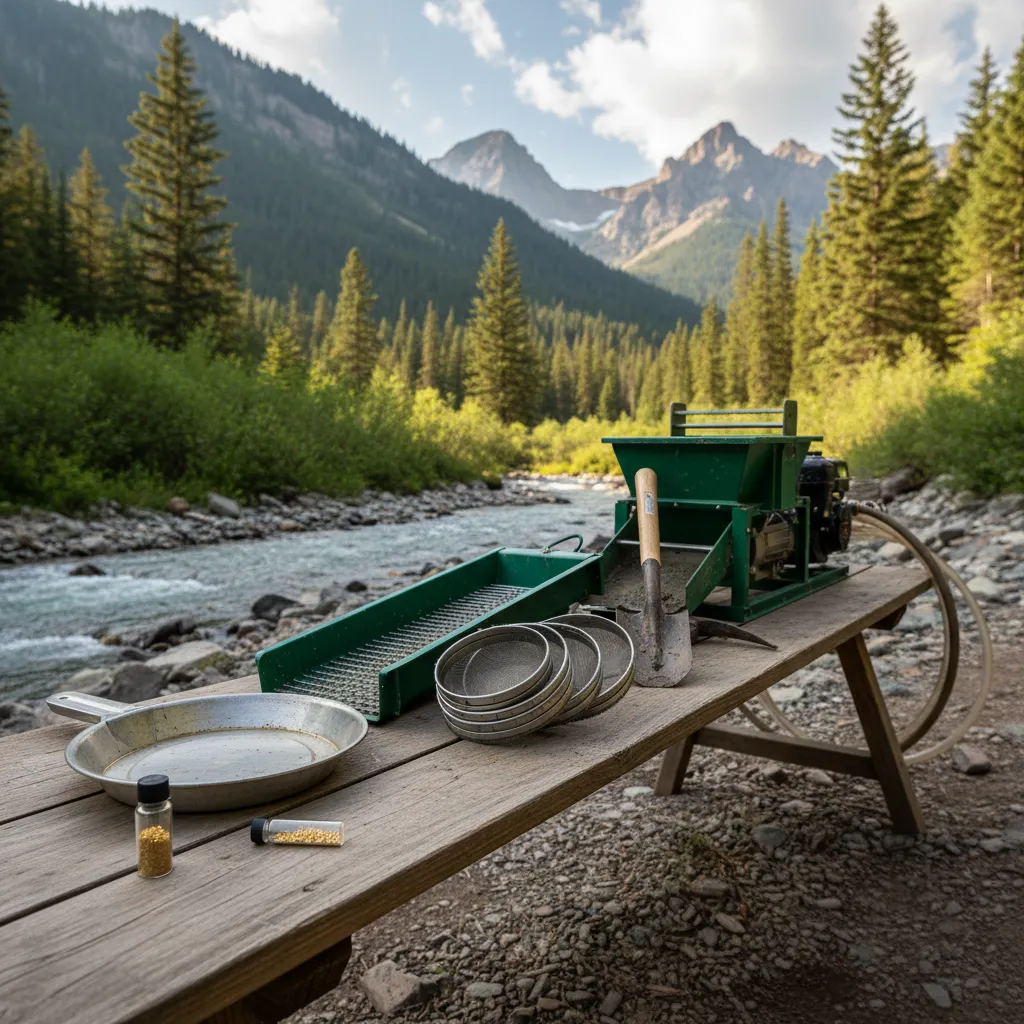
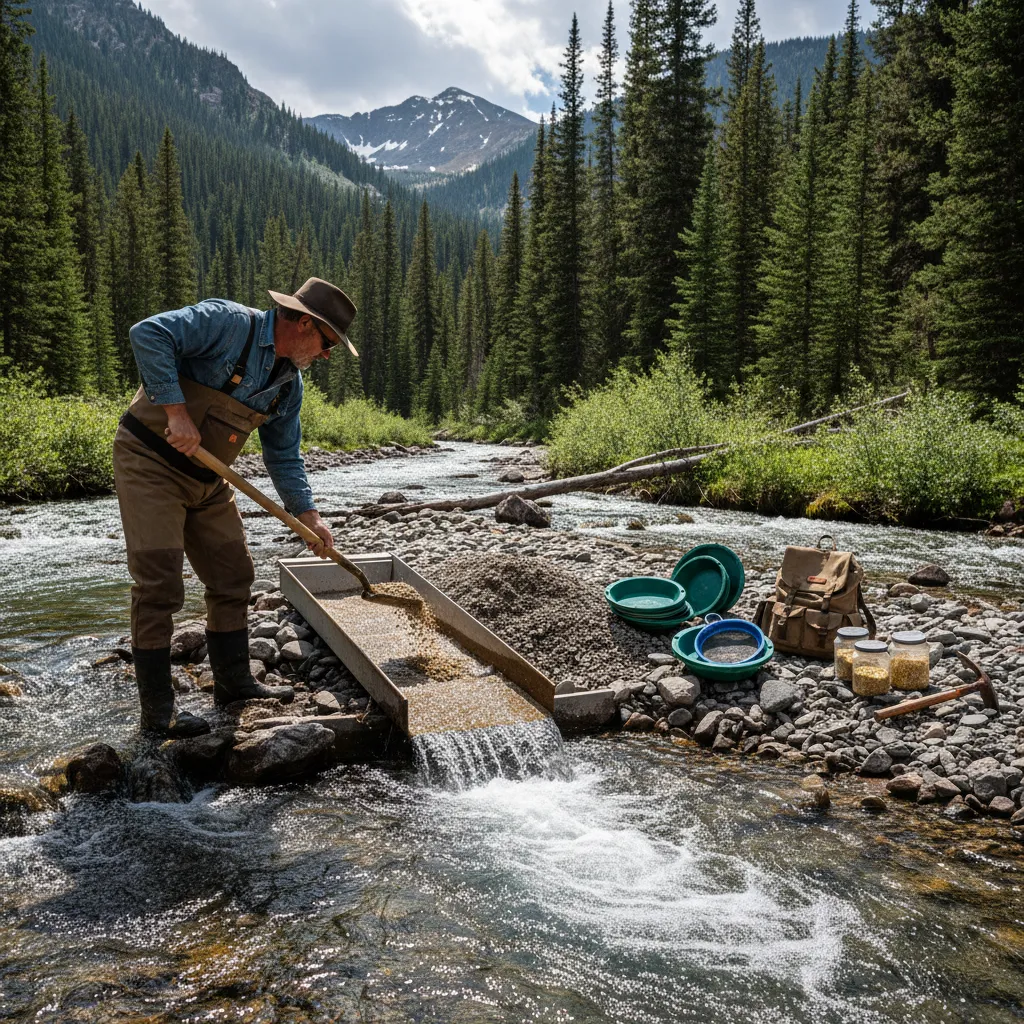
Sluice Box
A sluice box is a channel that uses flowing water to separate gold from gravel continuously. Instead of processing one pan at a time, you’re shoveling classified material into the top and letting gravity and water do the work. In a timed test, I processed about 15 pans worth of material through my sluice in the time it took to hand-pan 2 loads — roughly a 7:1 efficiency gain with classified material. A basic folding sluice runs $60-100.
Width dictates throughput — a 6-inch sluice is a good starter but requires classified material. A 10-inch can take a full shovel load without classifying, but needs more water flow and a steeper creek gradient to run properly.
My first sluice was a 24-inch Stansport folding model. It works. Not great, not terrible. If I were buying again, I’d spend the extra money on a Dream Mat TX Sluice ($97 for 6”x24”) or similar — better matting design, sturdier construction. The cheap ones flex in fast current and don’t sit flat, which means gold walks right over the riffles instead of getting trapped.
For matting, expanded mesh over Miner’s Moss is the most forgiving combo for beginners. It has a high capture rate and doesn’t require precise water speed. Specialty mattings like drop riffle or V matting are for later experimentation once you understand the basics.
I wrote a full guide to choosing and running a sluice box if you want to go deeper on matting types, water speed, and setup angles. It covers the details I’m glossing over here.
Fair warning: a sluice box doesn’t replace your pan. You still need to pan out the concentrates that collect behind the riffles. The sluice just processes material 10-20x faster than panning alone, so you end up with a smaller volume of concentrates to finish by hand.
Creek Gear
This is where beginners cheap out and regret it immediately.
Waders or waterproof boots. Wet cotton jeans in a mountain creek at 8,000 feet will ruin your whole day faster than finding no gold. I started with rubber rain boots from Walmart. They leaked within a month. Now I use neoprene hip waders — warmer, waterproof, and they let me get into deeper water where nobody else bothers to dig. Cost about $40-50.
Neoprene gloves. Your hands will be in cold water for hours. I didn’t wear gloves my first season because I thought it would reduce my dexterity. By November my fingers were so stiff I could barely operate the snuffer bottle. 3mm dive gloves, about $15. You lose a tiny bit of feel but gain the ability to prospect past September without suffering.
Sun protection. Water reflects UV like crazy. I got the worst sunburn of my life prospecting Clear Creek in June because I was focused on a productive bedrock crevice and didn’t notice four hours had passed. Hat, sunscreen, long sleeves. Not optional.
A good pack or 5-gallon bucket. I’ve moved to a bucket with a lid that doubles as a seat. Haul material in it, sit on it while panning, carry your gear home in it. Five bucks at Home Depot.
Crevicing tools. You don’t need a specialty set. A sturdy flathead screwdriver, a small brush, and tweezers will get gold out of bedrock cracks just fine. I wasted $25 on a “prospector’s crevicing kit” before realizing every tool in it was already in my garage.
Pointed-nose shovel. Get a pointed nose, not flat. A flat shovel can’t get between rocks unless you’re shoveling sand. The Razor Back from Home Depot ($30-40) is what most prospectors I know use. It lasts.
The $500+ Advanced Rig
This tier is for people who prospect regularly and want to cover more ground. I’m not fully here yet myself — I’ve spent maybe $400 total over three years — but I’ve used friends’ gear enough to have opinions.
Highbanker
A highbanker is basically a sluice box with its own water pump. You set it up on the bank (hence the name) and feed it material without needing to be in the creek. Recirculating models let you work areas with no running water, like old dry channels and ancient placer deposits. These run $200-400 for a decent unit.
A 6-inch highbanker is roughly 6x more efficient than panning and fits in a large backpack. The pump runs on minimal fuel. My buddy Mike runs a Keene A52S highbanker on the Arkansas River and processes more material in an afternoon than I can in a full weekend with my sluice. The difference is absurd. But it’s also 30 pounds of gear, needs a battery or generator for the pump, and takes 20 minutes to set up. It’s a commitment.
Hand Dredge
Before you go full power dredge, consider a hand dredge. You can DIY one from PVC pipe for under $20. It works like a large syringe — sucks material off bedrock crevices that shovels can’t reach. It’s one of the most underrated pieces of panning equipment for gold. All that fine gold trapped in bedrock cracks? A hand dredge gets it. A shovel doesn’t.
Gold Wheel / Blue Bowl
A blue bowl ($60-80) is a finishing tool for concentrates. It uses water flow and centrifugal motion to separate fine gold from black sand. Handy if you’re processing a lot of material, but I’d categorize it as “nice to have” rather than essential. I still finish my concentrates by careful panning, which works fine.
Power Sluice / Mini Dredge
Small suction dredges ($300-800) vacuum material from the creek bottom and run it through an onboard sluice. They’re the most efficient way to work a claim. They’re also regulated or banned in many states, so check your local gold panning laws before you even think about buying one. California’s dredging moratorium has been going since 2009. Colorado requires permits. Some states are wide open. Do the homework first.
For a full breakdown of every extraction method from pan to pit mine, I wrote a separate guide to gold mining techniques that covers when each tool makes sense.
Gold Panning Supplies: My Complete Field-Tested Checklist
Here’s exactly what I load into my truck for a full day of prospecting. This is my real, beat-up, field-tested gold panning gear after three years of trial, error, and the Wall of Shame.
Always in the pack:
- Garrett Super Sluice 14” green pan (primary)
- Garrett 10” pan (for quick test pans at new spots)
- SE 1/2” classifier screen
- Pro-Line snuffer bottle
- Fine-point tweezers
- 5 screw-top glass vials
- Small squeeze bottle of dish soap (cleans oil off pan between loads)
- Flathead screwdriver (crevicing)
- Small paintbrush (sweeping crevices)
- Hand lens / loupe (10x, for checking suspicious flakes)
- Pointed-nose shovel (Razor Back)
Always wearing:
- Neoprene hip waders (Frogg Toggs, ~$45)
- 3mm neoprene dive gloves
- Wide-brim hat
- Polarized sunglasses (cuts glare so you can read the water)
When running the sluice:
- Stansport 24” folding sluice (upgrading to Dream Mat soon)
- Keene stacking classifier set (1/2”, 1/4”, 1/8”)
- Two 5-gallon buckets (one for classified material, one as a seat)
- Extra Miner’s Moss matting (replacement)
In the truck (backup/comfort):
- Dry clothes in a bag
- First aid kit
- Sunscreen SPF 50
- Water and snacks (you will forget to eat)
- Extra vials and snuffer bottle
Total value of everything listed: roughly $350, accumulated over three years. Not $350 on day one — maybe $80 the first season, another $150 the second, and the rest as replacements and upgrades.
Gear Mistakes I’ve Made (So You Won’t)
After a few years of prospecting and more gear purchases than I’d like to admit, here’s what I’d tell myself if I could go back:
Don’t buy a kit. Those $50-80 “complete prospecting kits” are assembled from the cheapest possible components. The pan is usually undersized, the snuffer bottle is always garbage, and you’re paying a premium for packaging. Buy each piece individually. You’ll spend less and get better stuff. The best gold panning kit for beginners is the one you assemble yourself from quality individual pieces.
Don’t buy a sluice before you can pan. A sluice doesn’t find gold — it processes material faster. If you don’t know how to read a river and find productive spots, a sluice just helps you process barren gravel more efficiently. Learn the fundamentals first. Pan for a full season. Then upgrade.
Don’t overthink the pan. Some companies sell $30-40 “engineered” pans with special riffle patterns and premium plastics. A $14 Garrett (2026 price) works just as well. I’ve tested this side-by-side. Same material, same technique, same results. Your skill matters infinitely more than your pan’s riffle geometry.
Do invest in comfort gear. Waders, gloves, a good hat, a bucket to sit on. Comfort directly translates to time on the water, and time on the water directly translates to gold found. Every piece of comfort gear I’ve bought has paid for itself in longer, more productive sessions.
Do bring more vials than you think you need. Nothing worse than a productive day with nowhere to put your finds. I keep five empties in my pack at all times.
Do learn before you spend. If you’re trying to decide between a $200 metal detector for gold and a $200 sluice setup, ask yourself what skill you’ve already built. Each tool rewards a different set of knowledge. A sluice rewards someone who knows how to read a river. A detector rewards someone who knows how to read the ground — and old mine sites are prime detecting ground.
Choosing Equipment Based on Where You’ll Prospect
The gear that works perfectly on a gentle creek in Georgia will leave you frustrated on a boulder-strewn mountain stream in Colorado. After prospecting across multiple states, I’ve learned that where you’re headed matters almost as much as what you bring.
River and Stream Prospecting Gear
Most beginners start on rivers, and that’s smart — rivers do the work of concentrating gold for you. Your standard pan, classifier, and snuffer bottle handle 90% of river prospecting situations without any modifications.
The key variable is water temperature. If you’re working mountain streams in Colorado or Northern California at elevation, invest in neoprene waders and gloves before anything else. I’ve cut trips short because of numb hands more times than I’ve cut them short because I forgot a tool. If you’re prospecting in warmer states like Georgia or North Carolina, lightweight rubber boots are fine from April through October, and you can stretch into November most years.
For wide, shallow rivers with good flow, a sluice box is the obvious upgrade. For narrow, slow creeks, stick with hand panning — there often isn’t enough current to run a sluice effectively.
Desert and Dry Wash Equipment
Desert prospecting is a completely different game. Arizona’s gold-bearing washes and similar desert terrain have no running water most of the year, which means your sluice box is useless unless you bring a recirculating pump system.
For dry wash prospecting, your essential gear shifts:
- Dry washer ($150-400) — uses air bellows or a blower instead of water to separate gold from material
- Extra water supply — you’ll still need a few gallons for wet panning concentrates at the end of the day
- Classifying screens — even more important in desert material, which tends to be cemented with caliche and calcium deposits
- A shade canopy — this isn’t about comfort, it’s safety. I watched a guy nearly pass out working a claim outside Wickenburg in July without shade
If you don’t want to invest in a dry washer yet, bucket up dry material and haul it home to process with a blue bowl or wet pan. Less romantic, but practical and free.
Mountain and Backcountry Essentials
If you’re hiking into remote areas to reach abandoned mining sites or unworked stretches of creek, weight becomes the limiting factor. My backcountry kit is stripped to the essentials:
- One 14” pan (doubles as a plate, sorry not sorry)
- One small classifier
- Snuffer bottle and 3 vials
- Crevicing tools (screwdriver + brush)
- Hand dredge (PVC, weighs nothing)
Leave the sluice in the truck. Leave the stacking classifiers. You want to cover ground and test multiple spots, not set up a processing station. If you find a productive area, mark it with GPS and come back with the full rig on a day trip.
Seasonal Gear Adjustments
The time of year changes what you need almost as much as the location does.
Spring (March–May): High water from snowmelt means stronger currents and colder temps. This is sluice season — the extra flow actually improves sluice performance, and fresh material gets deposited on inside bends after every storm. But you need solid neoprene waders (not rubber boots), and I’d skip crevicing entirely until water drops. I’ve watched productive bedrock crevices that I cleaned out in October refill with gold by April just from spring runoff. Bring a longer-handled shovel so you can work from the bank instead of wading into fast current.
Summer (June–August): Low, warm water. Perfect conditions for hand panning and crevicing. This is when I do my best fine gold recovery because I can access exposed bedrock that’s underwater the rest of the year. Bring extra water for drinking — I’ve gone through a gallon in four hours on the South Platte in July. A shade tarp isn’t optional if you’re in open terrain.
Fall (September–November): The sweet spot. Water is low, temps are comfortable, and crowds thin out dramatically after Labor Day. I’ve had my best single-day recoveries in October. Bring layers — mountain creeks can swing 30 degrees between morning and afternoon. This is also when I run my sluice the most: stable water levels make it easy to dial in the perfect flow rate and leave it running.
Winter (December–February): Most recreational prospectors hang it up, but some rivers stay workable year-round. Insulated waders, chemical hand warmers inside your gloves, and shorter sessions. I limit winter outings to 2-3 hours max. The upside: you’ll have the entire creek to yourself, and gold doesn’t migrate in winter — whatever settled in fall is still there.
Matching Your Gear to the Deposit Type
Not all gold deposits are the same, and the equipment that works brilliantly on one type can be nearly useless on another. After cross-referencing recovery results with USGS mine data on the GoldFever.app, some clear patterns emerge.
Placer deposits (river gravels and ancient streambeds) are what most recreational prospectors work. These are the mines labeled “placer” in USGS records, and they’re concentrated in California’s Mother Lode, Colorado’s Front Range, and the Southeast Gold Belt. Standard panning equipment handles these well — your pan, classifier, and sluice box are purpose-built for this type of deposit. Gold in placer deposits ranges from flour to flake size, so a 1/8-inch classifier is critical for fine gold recovery.
Lode or vein deposits (hard rock mines with gold embedded in quartz) require different thinking. You won’t be panning quartz — but downstream from historic lode mines, erosion breaks gold free from the host rock. The gold tends to be coarser and more angular than typical placer gold. I’ve found that a 1/4-inch classifier works better near lode mine tailings because the gold pieces are larger and you’re processing more rocky material. A crevicing kit becomes essential here, too — gold from eroding veins collects in every bedrock crack downstream.
Residual deposits (gold weathered in place from the original source rock, common in the Georgia and Carolina gold belts) tend to produce very fine, flat gold. A standard sluice with Miner’s Moss matting can struggle with this stuff. If you’re working residual ground, either switch to expanded metal matting with a slower water speed or plan to finish everything by careful panning. The gold-bearing areas across the eastern US are dominated by this deposit type.
Bench deposits (ancient river gravels now above the current waterline) are dry — no creek to feed your sluice. You need a recirculating setup or a dry washer. These are especially common in Arizona and parts of California where rivers have shifted course over millennia. USGS records show heavy concentrations of bench placer mines across the desert Southwest.
The takeaway: before you gear up, check what types of mines historically operated in your target area. A five-minute search on our mine location database tells you whether you’re heading into placer, lode, or residual territory — and that determines which equipment earns its space in your pack.
Where to Use All This Gear
Equipment means nothing without productive ground. I’ve mapped over 75,000 historic mine sites on the GoldFever.app interactive mine map using USGS data, and the pattern is clear: the best spots for recreational prospecting are downstream from historic mine clusters on public land. Those old-timers found the gold — you’re just catching what they left behind and what nature has continued to deposit.
Find a spot before you buy more gear. Open the GoldFever map, zoom to your state, and look for clusters of placer mine pins on accessible public land. Save 3-5 candidate creeks, then match the gear in this guide to what you’ll actually encounter. Buying a sluice before you’ve identified a creek with running water is the single most common beginner mistake.
If you’re trying to figure out where gold is actually found across the United States, the answer is more places than most people realize. Our mine location database organized by state tracks gold-producing mines in over 30 states — not just the obvious ones like California and Colorado.
For getting started, pick a state and dig into the specifics:
- Colorado: Some of the most accessible gold panning in the country. My detailed Colorado guide covers exact creek names, access points, and what I’ve found at each.
- California: Despite what you might assume, there’s still plenty of gold in California — the Mother Lode region barely scratched what’s there. Just mind the dredging regulations.
- Arizona: Desert washes hold surprisingly rich placer gold deposits. My Arizona gold panning guide covers locations that produce year-round.
- Georgia and North Carolina: The eastern Gold Belt runs from Virginia through the Carolinas into Georgia. These are some of America’s oldest gold-producing areas — the first US gold rush happened in Georgia, not California. My guides for Georgia and North Carolina cover the best public access points.
Check out the best gold prospecting locations across the US for a broader overview. I’d recommend starting on a creek that’s known to produce rather than trying to discover a new spot — build your skills where gold is confirmed, then explore.
Equipment Regulations by State: What’s Allowed Where
Your gear choices aren’t just about preference — in some states, certain equipment is flat-out illegal. I’ve compiled a full state-by-state breakdown of gold panning laws, but here’s the equipment-specific summary:
Hand pans and classifiers are legal everywhere in the US on public land. No state restricts basic hand panning tools. This is the safest equipment category.
Sluice boxes are legal in most states without a permit, but a few require notification or restrict where you can set them up. Oregon requires you to stay below ordinary high water line. Some National Forest districts in California require a Plan of Operations for any mechanized or semi-mechanized equipment, which can include sluices depending on the ranger’s interpretation. When in doubt, call ahead.
Highbankers and power sluices enter a gray area. Because they use pumps, several states classify them as motorized equipment, which triggers permit requirements. Colorado requires a reclamation permit for any motorized equipment. Washington State restricts motorized equipment on many rivers during fish spawning seasons (typically October through June on salmon streams).
Suction dredges face the most restrictions. California has maintained a moratorium since 2009 with no end in sight. Oregon bans them on most waterways. Idaho, Montana, and several other states require permits with specific seasonal windows. A few states — notably Alaska, parts of Arizona, and some southeastern states — remain relatively open.
The bottom line: A pan and classifier will never get you in trouble. The moment you add a motor or pump, check state regulations first. I keep a printed copy of relevant permits in my gear bag because cell service at most prospecting sites is nonexistent.
Equipment Maintenance and Care Tips
Gear maintenance isn’t glamorous, but it’s the difference between equipment that lasts three seasons and equipment that falls apart after three trips.
Pans and classifiers: Rinse with clean water after every outing. Creek sediment is surprisingly abrasive and will degrade plastic riffles over time. Store pans flat — don’t stack heavy gear on top of them or the riffles warp. I learned this after finding my favorite pan slightly deformed under a bucket of rocks in my garage.
Sluice matting: Pull out the matting after every session and rinse both sides thoroughly. I lost noticeable gold recovery for two consecutive trips before realizing compacted clay had sealed up half my Miner’s Moss. Now I give it a proper scrub with a brush after each cleanup.
Snuffer bottles: Clean with warm soapy water occasionally or the suction gets weak. Replace rubber tips annually if you’re out weekly — they harden and crack with UV exposure.
Metal tools: Dry your crevicing tools, steel pans, and any metal components completely before tossing them in storage. Five minutes of toweling off saves you from finding a rusted mess the next time you open your gear bag.
Frequently Asked Questions About Gold Panning Equipment
What equipment do I need to start gold panning?
At minimum, you need a 14-inch plastic gold pan ($14), a classifier screen ($10-12), a snuffer bottle ($6-8), glass vials ($4-5), and tweezers ($2-3). That’s a complete gold panning starter kit for about $35-40 in 2026. Everything else — sluice boxes, highbankers, waders — are upgrades for after you’ve confirmed you enjoy the hobby and have learned basic technique.
What’s the best gold panning kit for beginners?
Skip the pre-packaged kits. The best beginner setup is individual pieces you choose yourself: a Garrett Super Sluice 14” pan, an SE classifier, a Pro-Line snuffer bottle, and screw-top vials. You’ll spend less than a packaged kit and get better components. Pre-made kits use the cheapest possible parts and charge a premium for the convenience of bundling.
How much does gold panning equipment cost?
In 2026, a basic starter kit runs $35-40. A serious setup with sluice box, classifiers, and comfort gear is about $175-225. A full advanced rig with highbanker or power sluice can reach $500-800. I’ve spent roughly $400 total over three years, buying upgrades incrementally as my skills justified them. Most of that went toward a sluice box, quality classifiers, and waders.
What is the difference between a sluice box and a gold pan?
A gold pan is a handheld dish you fill with gravel and manually wash to separate gold by weight — you’re doing all the work yourself, one load at a time. A sluice box is a trough with riffles that sits in a creek and uses the natural water current to separate gold continuously while you shovel material into it. The pan is slower but portable, cheap ($12), and requires no setup. The sluice processes 10-20x more material per hour but costs $60-100, needs flowing water, and still requires a pan to finish the concentrates. Think of it this way: the pan is the essential tool, the sluice is the force multiplier. My detailed sluice box guide covers how to set one up and dial in the water speed.
Is gold panning still profitable?
It depends on what “profitable” means to you. If you’re asking whether you can quit your job and pan for a living — almost certainly not. Recreational gold panning in productive areas typically yields $5-20 worth of gold per full-day session, though exceptional days happen. My best single day was roughly $85 in fine gold and small flakes from a bedrock crevice on Clear Creek, but I’ve also had plenty of days where I found $2 worth. At hobby scale, the math rarely pencils out against your time if you treat it as pure income. Where it does work: if you value the time outdoors, the treasure-hunting thrill, and the knowledge that your “hobby gear” costs less than a single round of golf each season. My total equipment investment of ~$350 over three years has returned maybe $600-800 in gold — a modest profit, but the real value is in the 200+ hours I’ve spent in mountain creeks instead of on a couch.
What is the difference between a sluice box and a highbanker?
A sluice box sits directly in the creek and uses the natural water current to wash material over its riffles. You shovel classified gravel into the top, and the current carries lighter material away while gold settles behind the riffles. A basic sluice costs $60-100. A highbanker is essentially a sluice mounted on legs with its own water pump — you set it up on the bank and pump water to it, which means you can process material away from the water’s edge or in areas with weak current. Highbankers are faster (roughly 6x more efficient than panning) and more versatile, but they cost $200-400, weigh 20-30 pounds, and need a battery or gas engine for the pump. Start with a sluice. Upgrade to a highbanker when the creek access is genuinely limiting your throughput.
Where can I pan for gold legally?
Most states allow recreational gold panning on public land (BLM, National Forest) without a permit, as long as you’re using non-motorized hand tools. Rules vary significantly by state — some require permits, some restrict specific waterways, and a few have seasonal closures to protect fish spawning habitat. I put together a comprehensive guide to gold panning laws by state that covers the specifics for every state. The safest bet for beginners: stick to established recreational panning areas on BLM or Forest Service land, use only hand tools, and check with the local ranger district office if you’re unsure about a specific creek.
Do I need a sluice box to find gold?
No. A sluice box processes material faster — roughly 10-20x faster than hand panning — but it doesn’t find gold on its own. You still need to know where to dig and how to read the river. I panned for an entire season with just a $12 pan before buying a sluice, and I’d recommend the same approach. Build the fundamentals first.
What size gold pan should I buy?
Get a 14-inch pan as your primary. It holds enough material to be efficient without being too heavy to control. A 10-inch pan is useful as a secondary for quick test pans at new locations. Avoid anything smaller than 10 inches (not enough volume) or larger than 16 inches (too heavy and unwieldy when loaded with wet gravel).
Green pan vs black pan — does it matter?
Yes. Gold shows up dramatically better against green or blue than against black. I switched mid-session once on the Arkansas River and immediately started spotting flour gold I’d been washing out all morning. If you’re colorblind (red-green), go with blue or black — green won’t help you. For everyone else, green or blue is the clear winner.
How do I maintain my gold panning equipment?
Rinse everything with clean water after each outing — creek sediment is abrasive and degrades plastic riffles over time. Store pans flat, not stacked under weight, or the riffles warp. For sluice matting, pull it out and scrub both sides thoroughly after every session. Snuffer bottles need occasional cleaning with warm soapy water or the suction weakens. Dry all metal tools completely before storage to prevent rust.
The Bottom Line on Gold Panning Gear
Start with $35 worth of panning equipment for gold and a creek that has gold in it. That’s all you need. The best equipment in the world won’t help if you’re working barren ground, and the cheapest pan in the world will find gold if you’re in the right spot with decent technique.
Upgrade when the gear is genuinely limiting you, not when a YouTube video makes something look cool. I upgraded to a sluice box after I found myself spending more time processing material than actually prospecting — the bottleneck was throughput, not technique. That’s the right reason to upgrade. “It looks fun” is not.
And if you end up with your own Wall of Shame shelf, at least you’ll have good stories about every item on it.
Your Next Steps
- Build the $35 starter kit from the individual components in this guide — skip the pre-made bundles.
- Learn the technique. Read our beginner’s guide to gold panning and practice the swirl-and-tap motion in your backyard before hitting a real creek.
- Find a productive spot near you. Open the GoldFever mine map and identify accessible public-land creeks downstream from historic placer mines in your state.
- Check the laws. Skim your state’s section in our gold panning laws by state guide before you start digging.
- Upgrade after one season. Only buy a sluice once hand panning has become your throughput bottleneck — not before.