Published
- 10 min read
How to Identify Gold: Tests That Actually Work

I have a jar of pyrite sitting on my bookshelf that I collected from the South Platte River in 2022. It’s labeled “GOLD????” in Sharpie because I was so convinced I’d struck it rich that I drove home going five under the speed limit so I wouldn’t crash and lose my treasure.
It was not treasure. It was iron sulfide. About $0.00 worth. Turns out, learning how to identify gold takes more than wishful thinking.
The embarrassing part is I showed it to three people before I figured it out. My buddy Travis was the one who finally said “dude, that’s pyrite” while trying very hard not to laugh. He failed at not laughing.
If you’ve ever pulled something shiny out of a creek and felt that electric jolt of “is this real?” — this guide will save you from the group chat humiliation I endured. Learning how to identify gold is mostly about knowing a handful of simple tests you can do right there on the riverbank, no lab required.
The Streak Test (Do This One First)
This is the single most reliable field test, and it takes about three seconds.
Grab a piece of unglazed ceramic — the back of a bathroom tile works, or you can buy a streak plate from a geology supply shop for a few bucks. Drag your mystery mineral across the surface with firm pressure.
Real gold leaves a gold-colored streak. Same warm yellow as the piece itself, every time.
Pyrite leaves a dark greenish-black streak. Doesn’t matter how gold it looks in your hand — the streak gives it away immediately.
I keep a small piece of unglazed tile in my prospecting kit specifically for this. It’s maybe 2 inches square, weighs nothing, and it’s saved me from embarrassing myself more times than I want to admit. If you only remember one test from this article, make it this one.
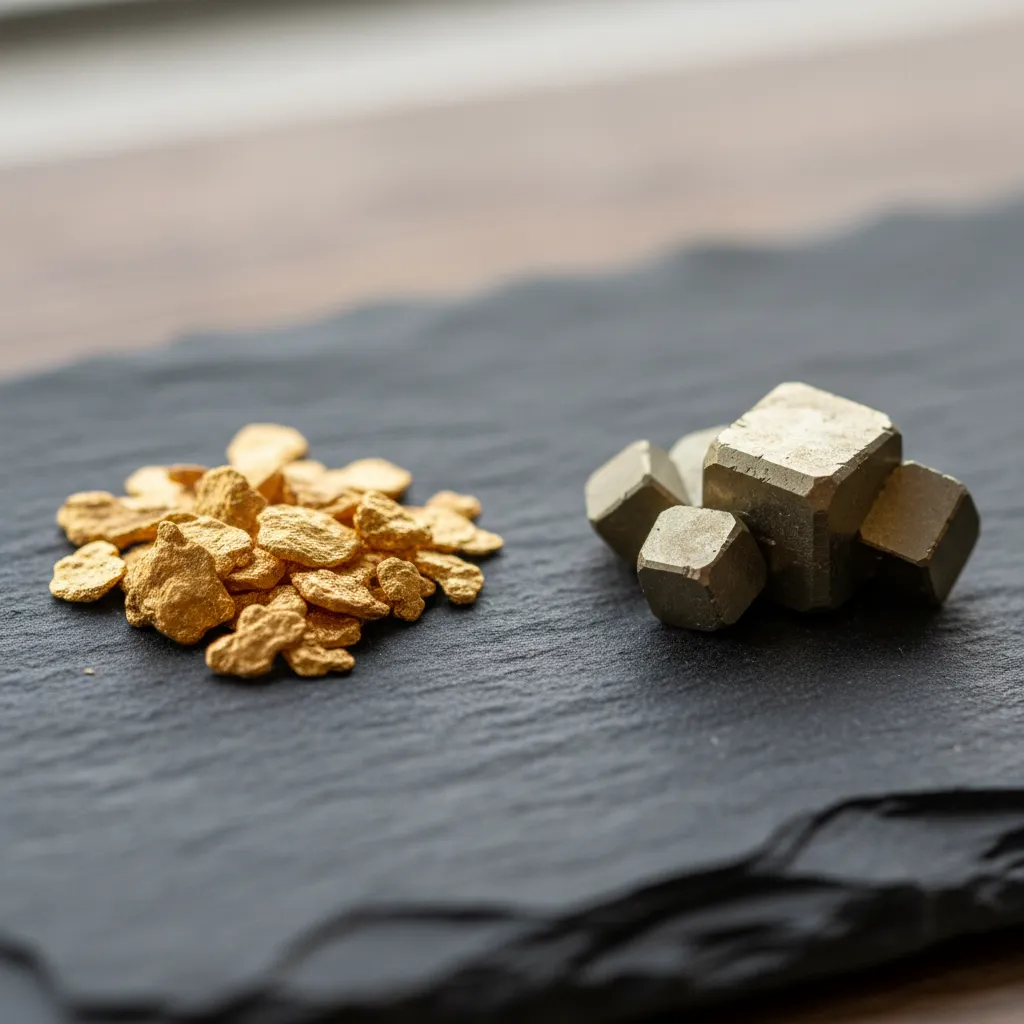
Gold vs Pyrite: The Visual Differences
Once you’ve seen real gold and pyrite side by side, the difference is obvious. The problem is your first time out, you haven’t seen them side by side. Everything yellow looks like gold when you want it to be gold.
Here’s what to look for:
Color
Real gold is a warm, buttery yellow that looks the same whether you’re in direct sunlight or shade. Rotate it, move it around — the color stays consistent. It has this rich, almost soft quality to it that’s hard to describe until you’ve seen it.
Pyrite is brassier. It has a metallic, slightly greenish tint, especially in sunlight. If the color shifts depending on the angle or looks “too shiny” — like costume jewelry rather than the real thing — it’s probably pyrite. One jeweler I watched on YouTube described real gold as having a “soul” compared to the flat shininess of fakes. Sounds dramatic, but once you see the difference, you’ll know exactly what he meant.
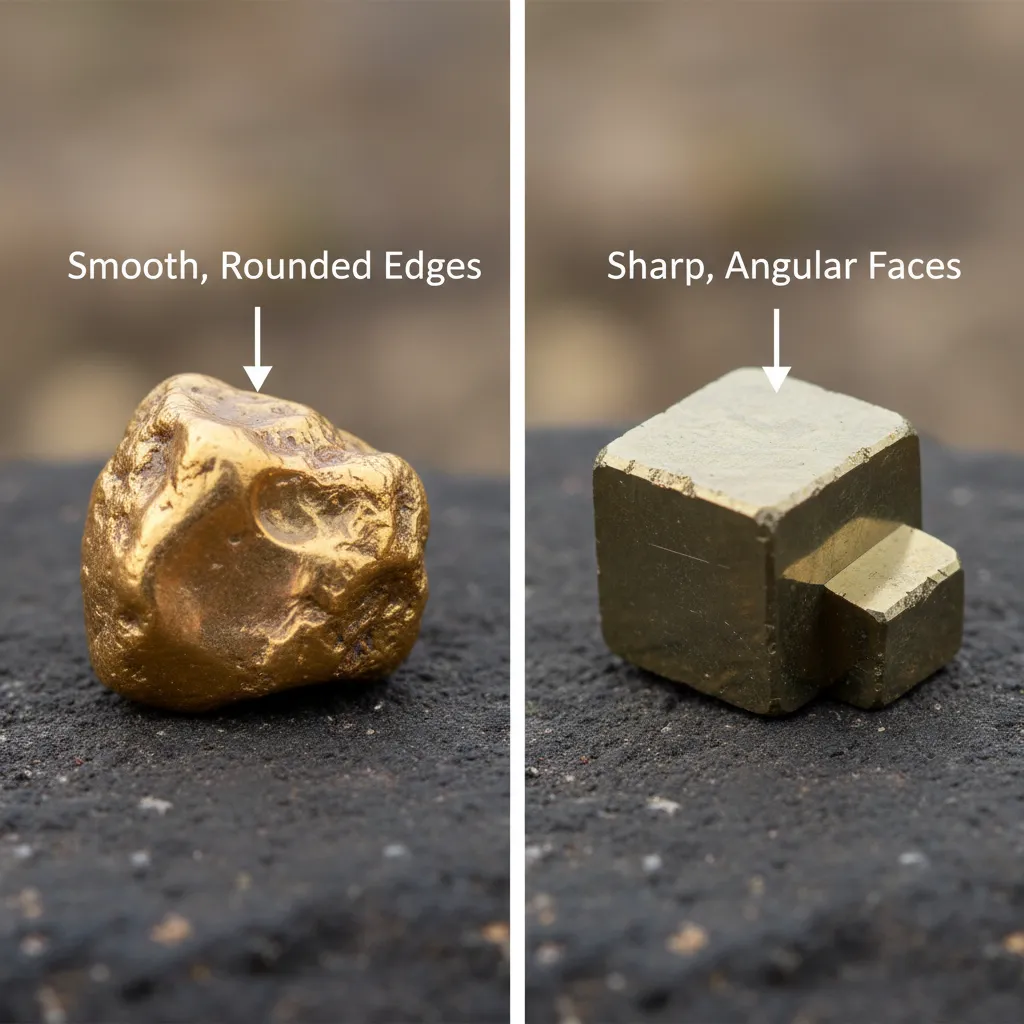
Shape
This one’s huge for placer gold specifically. Gold that’s been tumbling through creeks and rivers gets beaten into smooth, rounded shapes. Flakes, nuggets, wires — they all have soft edges from years of water erosion. Think of how river rocks get rounded over time. Gold does the same thing.
Pyrite forms angular, geometric crystals. Cubes, octahedrons, sharp edges. Nature doesn’t tumble pyrite into smooth shapes the way it does with gold. If your piece has defined crystal faces and sharp corners, that’s your answer right there.
Weight
Gold is absurdly dense — 19.3 g/cm³, which means it’s about 19 times heavier than water. Pick up a piece of real gold and it feels wrong for its size, like someone snuck lead into it. A piece of gold the size of a golf ball weighs roughly 4 pounds.
Pyrite has a specific gravity of about 5.0. Still heavier than most rocks, but nowhere close to gold. If you’re panning in a creek and your shiny flakes are floating around with the black sand instead of sitting dead on the bottom of the pan, they’re not gold. Real gold drops like it’s bolted to the pan floor.
The Hardness Test
Gold is soft. Surprisingly soft. Pure 24K gold has a Mohs hardness of about 2.5, which means you can dent it with a fingernail if the piece is big enough. Even alloyed gold (14K, 18K) is relatively soft compared to most minerals.
The fingernail test: Press your fingernail into the piece. Real gold will show a slight indentation. Pyrite won’t budge — it has a Mohs hardness of 6 to 6.5, which puts it harder than a steel knife blade.
The smash test: This one’s definitive but destructive, so only do it if you don’t care about preserving the piece. Put the sample on a hard surface and tap it with a rock or hammer. Gold is malleable — it flattens, deforms, squishes. It bends without breaking. You can hammer a gold flake thinner and it won’t shatter.
Pyrite is brittle. It shatters into angular fragments and gives off a sulfur smell (rotten eggs). If your “gold” crumbles when you tap it, congrats — you’ve made smaller pieces of not-gold.
I learned this lesson at a creek near Breckenridge when I tried to flatten a “nugget” with a rock and it exploded into a dozen pieces. The sulfur smell hit me about half a second later. That one didn’t even make it into the jar.
The Magnet Test
This one’s quick but limited. Hold a strong magnet (neodymium magnets work best) near your sample.
Gold is not magnetic. It won’t react to the magnet at all.
Pyrite is weakly magnetic in some forms, but honestly, most pyrite won’t stick to a magnet either. So a negative result doesn’t prove anything. But if your sample IS attracted to a magnet, you can rule out gold immediately. I keep a small rare-earth magnet on my keychain. Takes two seconds to check and eliminates the obvious fakes.
Where this test really shines is with gold-plated items or fake gold jewelry. Lots of costume jewelry uses a steel base with gold plating. A magnet pulls it right off the table.
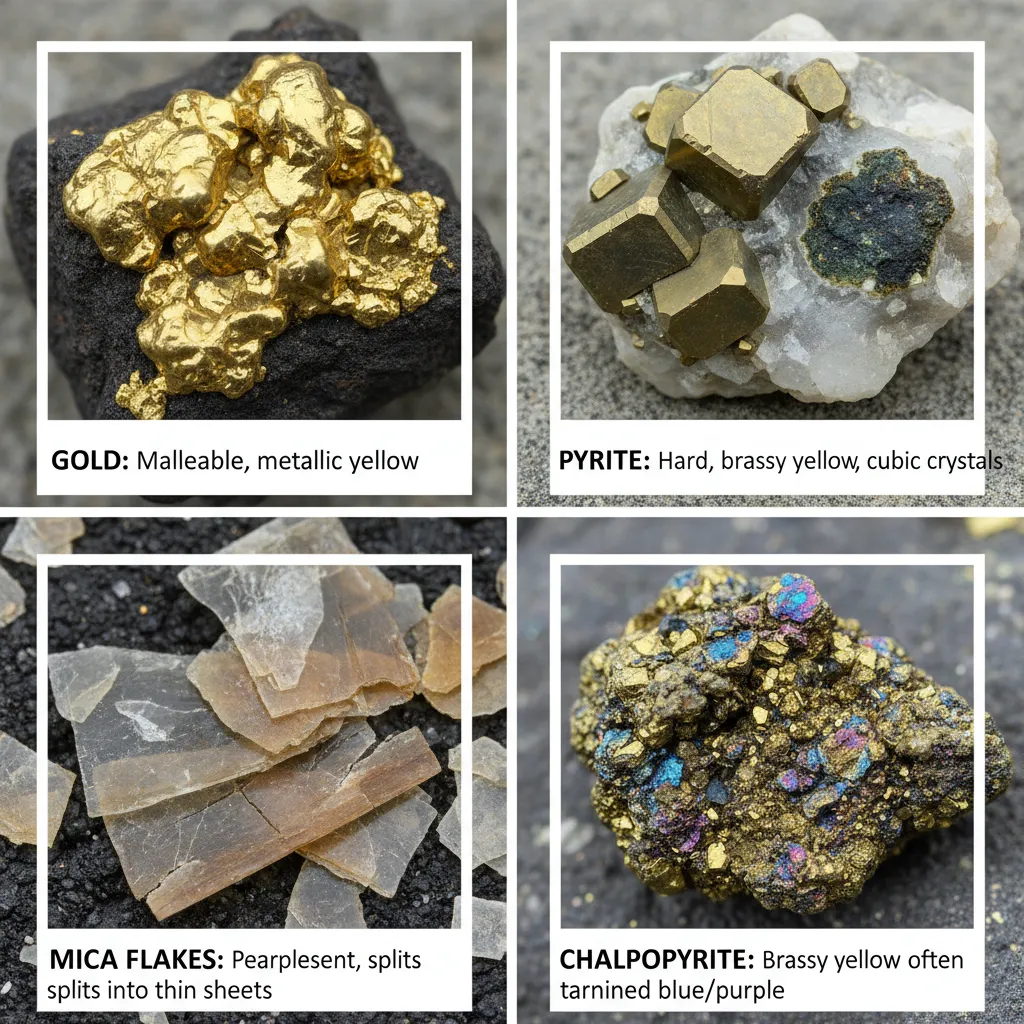
Other Minerals That Fool People
Pyrite gets all the fame as “fool’s gold,” but it’s not the only impostor out there. Here are the other common ones I’ve been tricked by or seen others mistake for gold:
Mica
Mica flakes are thin, shiny, and golden-colored. They’re everywhere in creek beds and they catch the light beautifully. The difference: mica is paper-thin, flexible, and basically weightless. It floats on water. Real gold doesn’t float. Ever.
If you’re panning and seeing tons of glittery flakes that ride the water surface instead of sinking, that’s mica. I still see it every single trip and for about half a second my brain goes “GOLD” before the rational part catches up.
Chalcopyrite
Chalcopyrite is copper iron sulfide and it looks more like gold than pyrite does, in my opinion. It has a deeper yellow color and a metallic luster that’s genuinely close to the real thing. The giveaway: it tarnishes to iridescent blues and purples. If your sample has any rainbow-colored oxidation on it, it’s chalcopyrite. Streak test shows greenish-black, same as pyrite.
Biotite
Biotite is a dark mica mineral that sometimes appears golden-brown and sparkly in certain light. It’s flaky, lightweight, and crumbles easily. Not a convincing gold substitute once you pick it up, but in the pan under water it can catch your eye for a second.
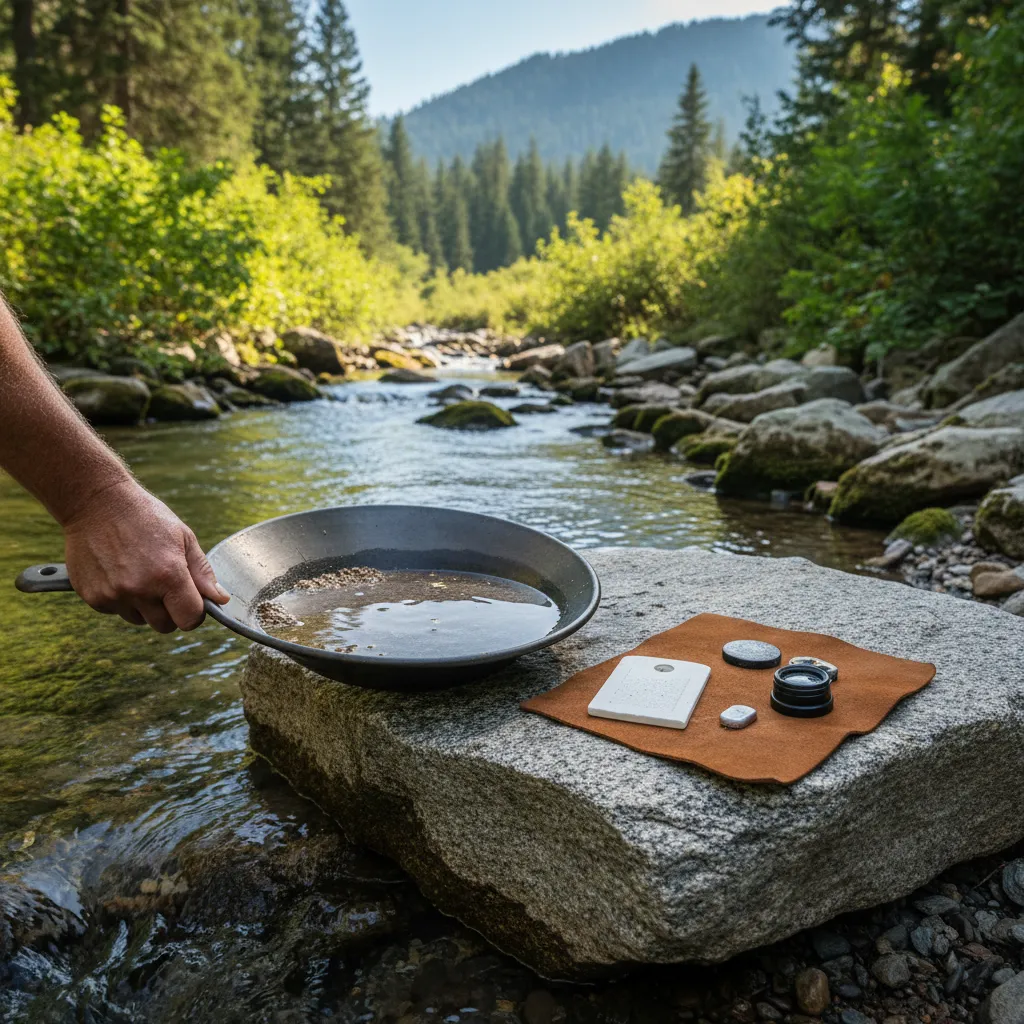
How to Identify Gold Anywhere: Your Field Testing Kit
After getting fooled enough times, I put together a small testing kit that lives in my pack. Total cost was maybe $15:
- Unglazed ceramic tile (streak test) — the single most useful item
- Small neodymium magnet — quick elimination test
- 10x hand lens / jeweler’s loupe — seeing crystal structure vs smooth surfaces
- Steel nail or knife — hardness comparison (steel is about 5.5 on Mohs scale; gold is softer, pyrite is harder)
Some people carry acid test kits in the field. I don’t. Nitric acid is corrosive, destroys part of the sample, and honestly if a piece passes the streak test, shape check, and hardness test, I’m confident enough to take it home. You don’t need acid on the riverbank. Save that for the workshop.
If you’re just getting started building out your gear, I put together a full gold panning equipment guide that covers everything from basic pans to advanced setups.
When to Get a Professional Assay
If you find something substantial — a piece big enough to hold between your fingers, or you’re consistently pulling color from a spot and want to know the purity — get it assayed.
A fire assay is the gold standard (pun intended) for determining exact gold content. A lab melts your sample and separates the metals. Costs typically run $30 to $75 per sample depending on the lab and what you’re testing for.
An electronic tester at a jeweler is faster and cheaper (sometimes free if you ask nicely). These measure electrical resistance to estimate karat purity. Decent for jewelry but less precise for raw placer gold with lots of impurities.
You’ll want an assay if:
- You’ve found a promising spot and want to know if it’s worth serious time
- You have a nugget and want to determine karat/purity before selling
- You found something that passes all your field tests but still looks unusual
Most prospectors never need an assay for casual panning. But if you’re finding gold consistently in the best prospecting locations around the US, it’s worth knowing exactly what you’ve got.
Quick Reference: Gold vs Pyrite vs Common Lookalikes
| Test | Gold | Pyrite | Mica | Chalcopyrite |
|---|---|---|---|---|
| Streak | Gold/yellow | Greenish-black | White | Greenish-black |
| Hardness | 2.5 (soft) | 6-6.5 (hard) | 2-3 (soft, flexible) | 3.5-4 |
| Shape | Smooth, rounded | Angular crystals | Flat, flaky sheets | Irregular masses |
| Density | 19.3 g/cm³ | 5.0 g/cm³ | 2.8 g/cm³ | 4.2 g/cm³ |
| Magnetic | No | Weakly | No | No |
| Smash test | Flattens | Shatters (sulfur smell) | Peels apart | Shatters |
Stop Second-Guessing Yourself
Here’s what I’ve learned after years of prospecting and way too many pyrite incidents: knowing how to identify gold gets easy fast. After your third or fourth trip to a gold-bearing river, you’ll develop an eye for it. Real gold has a quality that’s hard to put into words but impossible to miss once you’ve trained your brain to see it.
My advice: bring a known piece of gold with you to the creek. Even a tiny flake in a vial. When you find something questionable, hold it up next to your reference piece. Compare the color, the luster, the weight. Within a few trips, you won’t need the comparison anymore.
And if you do accidentally collect a jar of pyrite and show it to your friends? Just own it. We’ve all been there. Even Gene — the retired prospector who taught me how to pan at Clear Creek — told me he came home with a pocket full of mica his first time out. “Worst part was I’d already called my wife from the payphone to tell her I was rich,” he said. He didn’t elaborate, but I got the sense dinner was quiet that night.